My 1952 Dodge M37 re-building process

Build and Restoration Threads Belong Here

Moderators: Cal_Gary, T. Highway, Monkey Man, robi

User avatar
Argie1978
SGT
SGT
Posts: 178
Joined: Fri Jan 21, 2022 6:39 am

My 1952 Dodge M37 re-building process

Post by Argie1978 »

I'm opening this thread as I know is usual here to post the re-building stages.
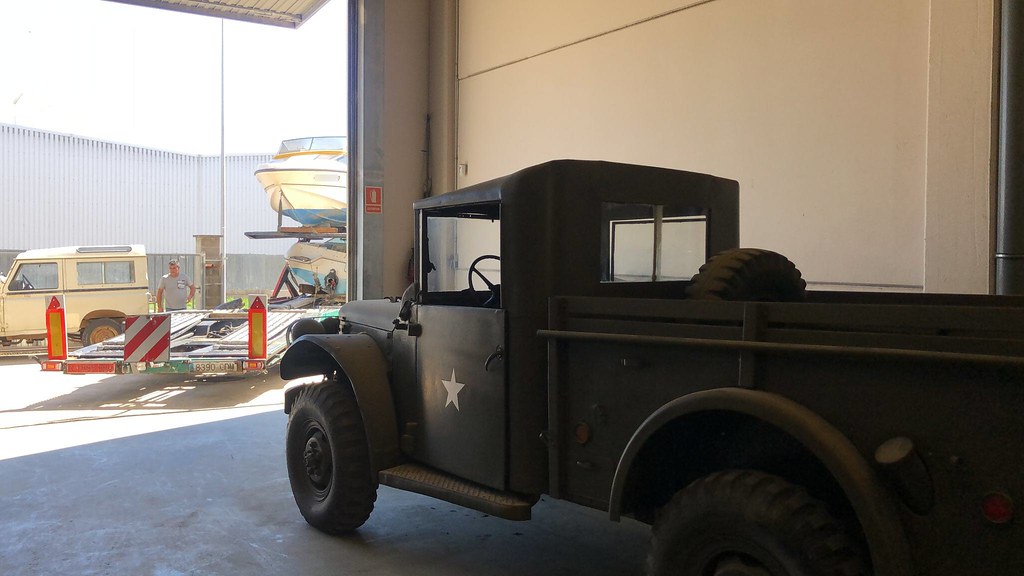
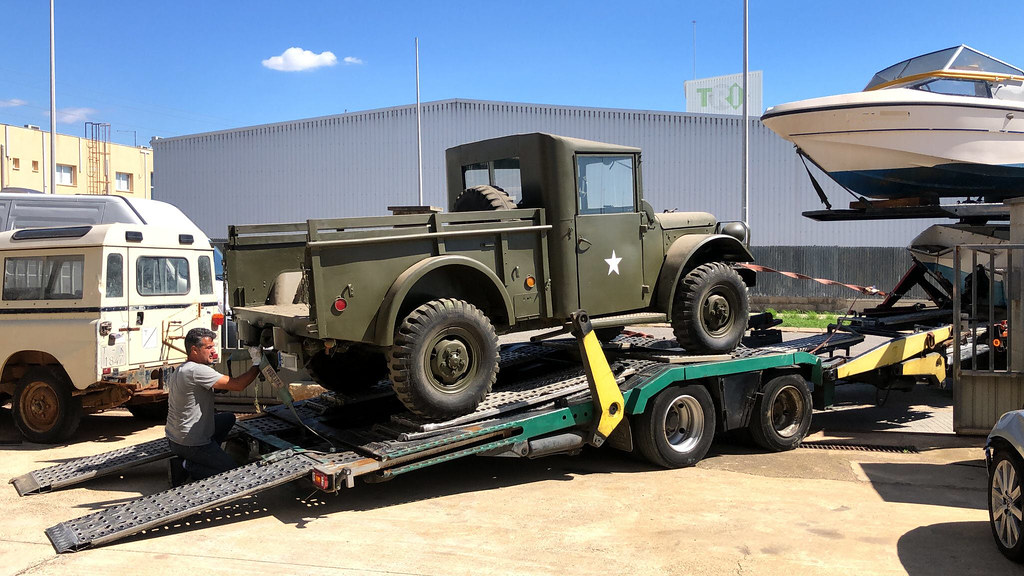
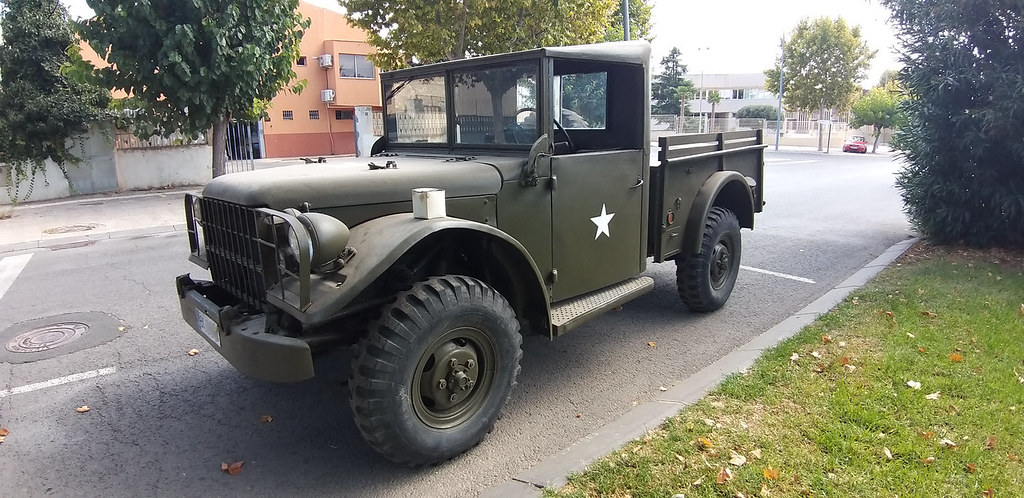
First, just a few pics from when I found the truck. These are back in June '21....

Image

Image

Image

Some might say "mint condition" at first sigh but it ain't like that....
Image

Image

Image
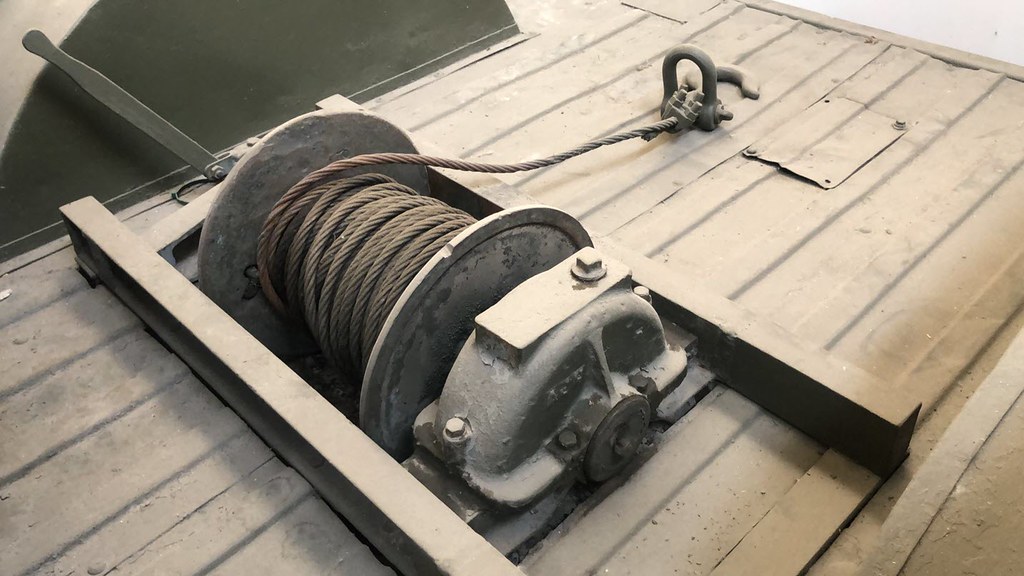
Note the winch base on the bed. Still wondering what did they have in mind....

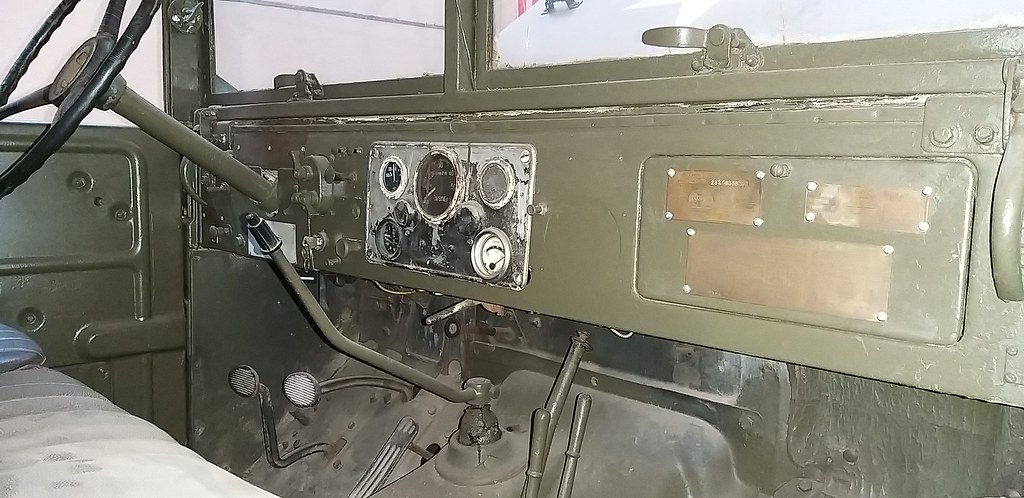
I've never seen a vehicle with so many layers of paint. I'm not joking when telling 3 mm of paint have been applied thru the years. And so badly done it makes me angry. More details about that later.

Image
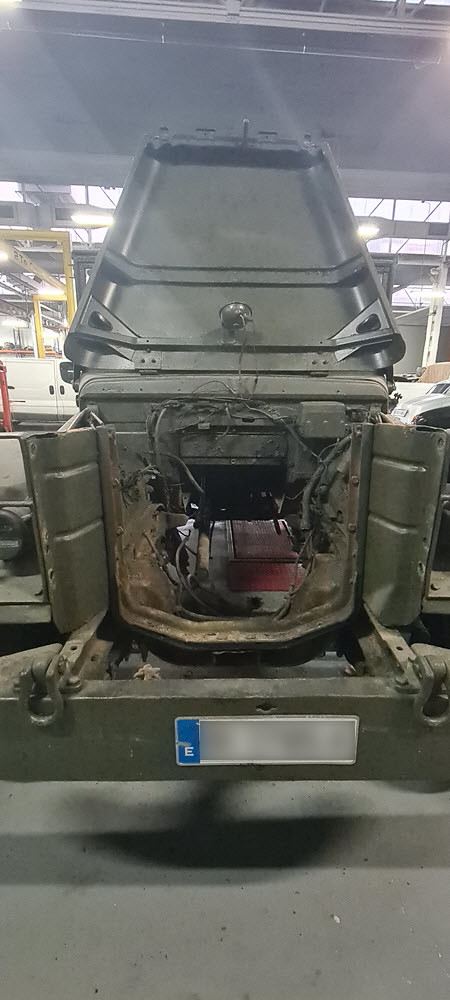
Tried to follow these cables that day. Impossible. Lots of switches on the dash. Why? More on that later

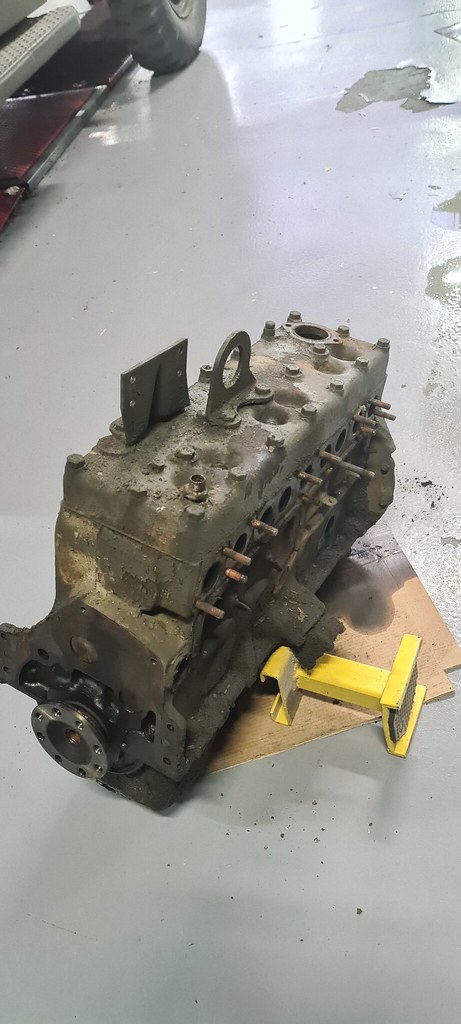
Engine I got in my truck is the venerable T214. As mentioned in another thread the carb is not original and after checking it a bit in detail I found it's a Spanish-made Bressel brand, model 34 DMS. These ones were very popular back in the 70s in Seat engines.

Image
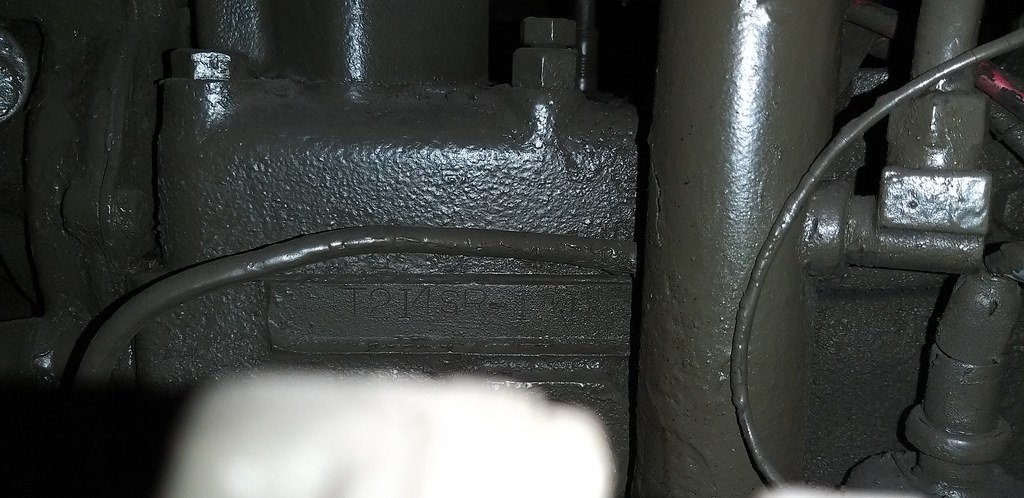
Serial not possible to be revealed that day. Again, layers of paint everywhere.

Image
Note an old coil still attached to the body.

Image

Image
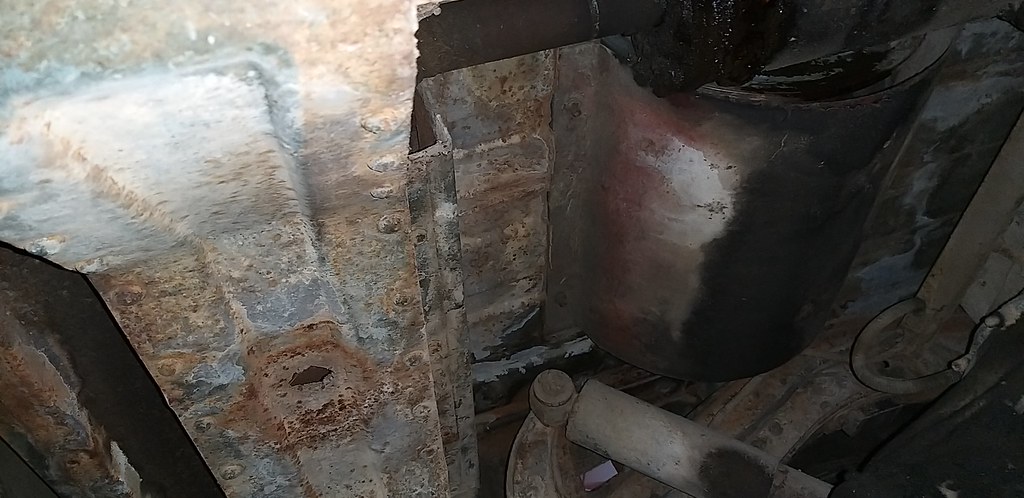
Didn't know the 214's used to come with a heat shield below the manifold. Aftermarket addition?

Image

Ok, that's all for the moment, folks. The shop where the job is being carried out is 36km from home so I cannot be everyday on this.
I have more photos from the shipping of the truck, the arrival at the shop and when the real work started. Next week I'm gonna be posting that part. In future editions I'll be uploading pics of the overhauling and every time I consider there's an update to show.
See ya.

Sebastián
Last edited by Argie1978 on Wed Aug 10, 2022 4:10 am, edited 1 time in total.
Sebastian
(sorry, I only speak in METRIC)
U404S
PFC
PFC
Posts: 58
Joined: Sat Aug 03, 2013 6:37 pm

Re: My 1952 Dodge M37 re-building process

Post by U404S »

Hi there Sebastian, You have a very nice truck indeed.

Curious what the scope of your restoration will be, particularly what your shop will be doing and labor hours budgeted.

It would be interesting to see the shafting and engineering of the winch in the bed of your truck. That set up is pretty nifty. Cheers, Jerry
User avatar
Argie1978
SGT
SGT
Posts: 178
Joined: Fri Jan 21, 2022 6:39 am

Re: My 1952 Dodge M37 re-building process

Post by Argie1978 »

Hi Jerry,
The first thing is to make it run as the engine was in bad shape. But there are more things to do (electrical, the bed, rust...).
Regarding the winch, the crew will remove the bed this incoming week. Nifty? Well, I mentioned this truck once belonged to a crane company, the bed was welded to the frame to give some strength to the whole set (the bed sits on almost 2 cm thick pieces of iron welded to the frame :cry: ). I cannot be there so I'm expecting pictures.

I'm gonna be honest here, I'm a very busy person in my professional life and I wish I could be more present, and I don't have the place nor the tools to work alone. Budget is not unlimited at all but I don't want this project to last forever. I've seen trucks here in this website laying on garage's floors years and years before they're started. Others start good, with milestones achieved and then into oblivion. Other ones will never start, or perhaps, with luck after a decade or more, a curious grandson will pick the rusty parts and start wondering what to do with them and move forward with grandpa's idea.
I hope nobody feels bad for this. Life has lots of hard ways to stops our projects and dreams. But I've carefully analyzed it and what cannot be done today will be done tomorrow, but tomorrow will be.

Sebastian
Sebastian
(sorry, I only speak in METRIC)
Cal_Gary
Moderator
Moderator
Posts: 4241
Joined: Mon Oct 22, 2007 5:51 am
Location: Draper, Utah

Re: My 1952 Dodge M37 re-building process

Post by Cal_Gary »

Hi Sebastian,
Thanks for the photos and your commentary.
I too, had limited time and budget for my M37. I just decided to do little sub-projects one at a time, plugging away with no time table for completion. It took 10 years to finally get mine on the road-I can tell you now that the wait was worth it! Once you get the OD fever it's difficult to get away from it. I know it can be daunting to see the truck needing so much work. Mine was in just as poor shape as yours but I knew parts vendors and support would be available for my thousands of questions. Those same resources are available for you and everyone else looking to save an M37 or other HMV-don't hesitate to reach out if you need help!
Gary
Cal_Gary
1954 M37 W/W
MVPA Correspondent #28500
User avatar
Argie1978
SGT
SGT
Posts: 178
Joined: Fri Jan 21, 2022 6:39 am

Re: My 1952 Dodge M37 re-building process

Post by Argie1978 »

Thanks Gary. We all know what we get into when we start things like these. It's a long journey sometimes. And Of course we should enjoy it.
More info comin'. :)

Sebastian
Sebastian
(sorry, I only speak in METRIC)
User avatar
Argie1978
SGT
SGT
Posts: 178
Joined: Fri Jan 21, 2022 6:39 am

Re: My 1952 Dodge M37 re-building process

Post by Argie1978 »

I bought the truck in mid July 2021 after coming and going discussing the price with the seller.
Here the pics during arrival on October 1st, at the shop.

Image
Ready to load at origin, Tarragona, ES.

Image

Image
Unusual shipping combination?

Image
Arrival.

Image
Waiting for getting it into the shop. Guys used a Hummer for towing.

Next chapter: first real impressions.

Sebastian
Last edited by Argie1978 on Wed Aug 10, 2022 4:14 am, edited 1 time in total.
Sebastian
(sorry, I only speak in METRIC)
Cal_Gary
Moderator
Moderator
Posts: 4241
Joined: Mon Oct 22, 2007 5:51 am
Location: Draper, Utah

Re: My 1952 Dodge M37 re-building process

Post by Cal_Gary »

Great photos-thanks!
Gary
Cal_Gary
1954 M37 W/W
MVPA Correspondent #28500
NAM VET
1SG
1SG
Posts: 1118
Joined: Mon Aug 22, 2016 6:27 am

Re: My 1952 Dodge M37 re-building process

Post by NAM VET »

from the pictures, your truck looks to be in a lot better shape than what many here have started with. Keep us informed. and best wishes.... Hal
User avatar
Argie1978
SGT
SGT
Posts: 178
Joined: Fri Jan 21, 2022 6:39 am

Re: My 1952 Dodge M37 re-building process

Post by Argie1978 »

Image

The truck arrived to the shop by the first days of October and sat there untouched until mid November. I had business trips and also was trying to save some money before starting the process. I think I've mentioned the shop is big and the crew has no problem to give some space even if there's no work on the truck been carried (hell, they have a few cars waiting for long....).

The first thing was to draw a plan:
1) clean all fluids and repair gas tank, as I assumed it was full of dirt as told by the previous owner
2) check engine's health, as I knew it could start and idle a bit
3) redo the brakes
4) check electricals
5) apply missing parts to pass the MOT test (called ITV here in Spain), like turn signals in the rear, some new gauge, rearview mirrors (missing..), etc.

Image
No other way to tow the beast.

Everything else, like paint, new roof, removing the winch, canvas, was a nice-to-have and/or would be done after passing the test.
INDEED THIS PLAN WAS A COMPLETE FAILURE.

Image

Image

After removing the gas tank and cleaning the pipes, the first thing was checking the engine's capabilities. I knew it was in bad shape, but man....

Image
The 4th cyl was desperately seeking for help.

When checking the engine we also saw some nice indentations in the radiator. It was sent to a rad specialist.
I started to make numbers in my head for the engine's rebuild.

Image

Image

The water hose was bad and rust could be seen in where the water pump attaches to the block. So I ordered a new water tube from Midwest along with a few more things.
When checking the frame without dismantling the truck I saw some corrosion that needed attention. Far from serious but the job done to get the winch on the bed did bring some rust in the weld spots. The bed was planned to be removed eventually because of the floor's reconstruction and the tool box had lot of corrosion. So you can imagine that by not having the engine, having an eventual plan to take the bed off, and now seeing corrosion on the frame we dropped that silly plan for good and went back to the old style: total dismantling.

Luckily the clutch disc was in good shape, so it was the transmission and gearbox. The transfer case seems to be ok (not checked), the fuel pump is a question mark.

Image
Is it worth to buy a battery box?

Sebas
Last edited by Argie1978 on Wed Aug 10, 2022 4:17 am, edited 1 time in total.
Sebastian
(sorry, I only speak in METRIC)
User avatar
Argie1978
SGT
SGT
Posts: 178
Joined: Fri Jan 21, 2022 6:39 am

Re: My 1952 Dodge M37 re-building process

Post by Argie1978 »

NAM VET wrote: Thu Mar 17, 2022 5:44 am from the pictures, your truck looks to be in a lot better shape than what many here have started with. Keep us informed. and best wishes.... Hal
Thanks for the wishes, Hal. It looks good (albeit the worst paint job I've seen...) and I am optimistic, but mechanically is not great.
And wait for the electrical part....

Sebastian
Sebastian
(sorry, I only speak in METRIC)
User avatar
Argie1978
SGT
SGT
Posts: 178
Joined: Fri Jan 21, 2022 6:39 am

Re: My 1952 Dodge M37 re-building process

Post by Argie1978 »

December was a quiet month, and while I was staying with the family in New York for the holidays I reached out to Peter DeBella from Long Island to see if he could get me a tailgate. By that time I had made like 10 phone calls here in Europe and exchanged emails with Matt from VPW, John Colwell from Vintage Military Trucks, Mike's Motor Pool's crew, etc....
Nothing. I was not even asking for the part in good shape.
Why nobody told me it was so hard to find a darn tailgate? Also, as I discovered some topics here and in other MV forums telling how hard was to find the part and, if so, preserved enough to be installed I was starting to get nervous.
Maybe I was lucky, I don't know. Turned out Peter had a few tailgates at the time! :D
Due to a snowstorm the first week of January he was unable to check them in a warehouse where he was keeping such parts so I returned to Spain with the promise of the gentleman to find me one in the most decent shape and my commitment to buy it.

By the end of January (while I was checking where to do the machining of the the engine) I got the confirmation from Peter:

Image

Image
Ready to be shipped.

I asked Peter to Send the tailgate to Miami. From there the boys at the shop would take care of the transshipping.
The container hasn't arrived yet due to lot of delays we're suffering in the entire supply chain worldwide (I know it as I work on this subject).

Sebastian
Last edited by Argie1978 on Wed Aug 10, 2022 4:19 am, edited 1 time in total.
Sebastian
(sorry, I only speak in METRIC)
Cal_Gary
Moderator
Moderator
Posts: 4241
Joined: Mon Oct 22, 2007 5:51 am
Location: Draper, Utah

Re: My 1952 Dodge M37 re-building process

Post by Cal_Gary »

Nice find-congratulations!
Gary
Cal_Gary
1954 M37 W/W
MVPA Correspondent #28500
User avatar
Argie1978
SGT
SGT
Posts: 178
Joined: Fri Jan 21, 2022 6:39 am

Re: My 1952 Dodge M37 re-building process

Post by Argie1978 »

No progress from mid January to mid February, except for the engine that got transferred to the machining shop.
Then by the end of Feb the dismantling took place. First, some pictures previously taken for the electrical situation.

Image Image

Image Image

Image

Apart that almost no light nor indicator was working, when removing the harness it teared in the hands. Like it was made of dust. Impossible to be save.
The blackout light were covered years ago when the truck got painted and they left the (sort of...) mask tape on. Now it's impossible to be removed easily with the hands or by a tool (although I don't want to damage the glass). I'm thinking on sandblasting them but still not quite sure,...any recommendations?

As usual, whenever I was having a free moment, I was procuring parts.

Image Image

Image Image

The following days I'll try to upload pictures of work done in late March.
Regards,

Sebastian
Last edited by Argie1978 on Wed Aug 10, 2022 4:22 am, edited 1 time in total.
Sebastian
(sorry, I only speak in METRIC)
John Mc
SSGT
SSGT
Posts: 356
Joined: Mon Oct 07, 2019 5:27 pm
Location: Monkton, Vermont

Re: My 1952 Dodge M37 re-building process

Post by John Mc »

Argie1978 wrote: Mon May 16, 2022 11:48 pm The blackout light were covered years ago when the truck got painted and they left the (sort of...) mask tape on. Now it's impossible to be removed easily with the hands or by a tool (although I don't want to damage the glass). I'm thinking on sandblasting them but still not quite sure,...any recommendations?
If it is actually glass, there are adhesive removers that might work. Note that some of these can also damage paint, so you'd want to double check their use near painted surfaces and/or do this on something where you are either about to repaint anyway, or have a good way of protecting adjacent painted surfaces.

Here's one I've used in the past which is supposed to be safe around paint. I was not using it in an automotive type application, but it did work well for me. https://www.amazon.com/gp/product/B006RU65UG/

John
1951 M37 "Brutus" w/Winch and 251 engine
RCrombie
CPL
CPL
Posts: 158
Joined: Tue Jun 20, 2017 2:02 pm
Location: Ottawa, Canada

Re: My 1952 Dodge M37 re-building process

Post by RCrombie »

Hi Sebastian,

I had the exact problem with my truck’s blackout lights as well. If you pop the door off, you will find you can gently pry back the folded sheet metal that holds the lens in, and then it all comes out. There’s a gasket, a mask to create the little Y shapes, and the lens, which in my case was some type of plastic. A little sanding, starting with around 180 grit and working to something like 1500 and they looked great again.
After putting in that work, I replaced them outright with gamma goat lenses as I wanted to be a little more visible.
Post Reply