Project: Old Guard - lots of pictures

Build and Restoration Threads Belong Here

Moderators: Cal_Gary, T. Highway, Monkey Man, robi

Post Reply
Master Yota
MSGT
MSGT
Posts: 828
Joined: Sun Nov 15, 2009 11:50 am
Location: Prince George BC Canada
Contact:

Post by Master Yota »

Will, I found the recomended Dodge MC-SC on RockAuto.com and the prices were very reasonable - but as usuall thats a US supplier. Up here in the great white north my parts guru wants amost 200 bucks for the MC! and thats a reman unit! I politley declined after I got up off the floor....

I was considering a GM unit from the late 80's when they still used the SM465 4spd trans and a hydraulic clutch setup - but there are problems with that too. The MC is available, but the plastic resevoir and clutch pedal rod have been discontinued.

Thanks for the info on Willwoods MC - I'll check it out :)
Ray
1953 CDN. M37
1954 CDN. M152
Master Yota
MSGT
MSGT
Posts: 828
Joined: Sun Nov 15, 2009 11:50 am
Location: Prince George BC Canada
Contact:

Post by Master Yota »

Well, I ordered the Willwood MC - should be here sometime next week, so in the mean time I worked on a few other things.

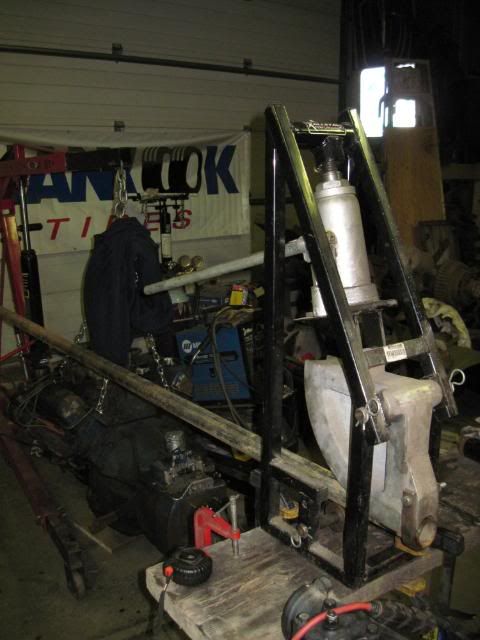
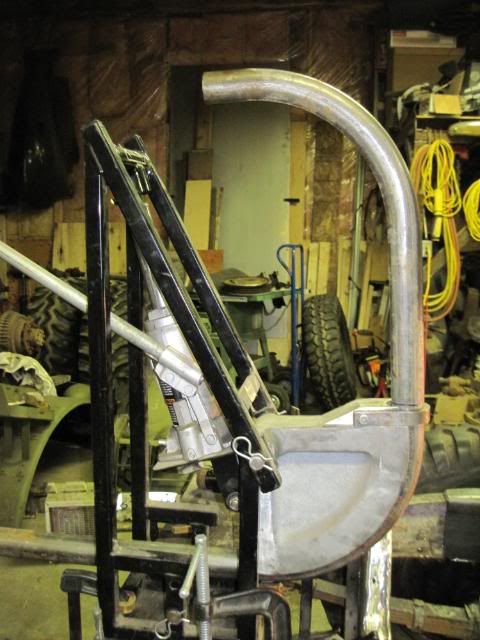
I had to redesign the steering coloum mount after I installed the hanging pedals from Ugly Truckling. Here are a few shots.

I decided to mount the end of the coloum support to the pedal stop. I bolted the orriginal support to the pedal plate and then adjusted the pedal stop to its final position. Then I fabbed up a mount to go between the two mounts.
Image
Image

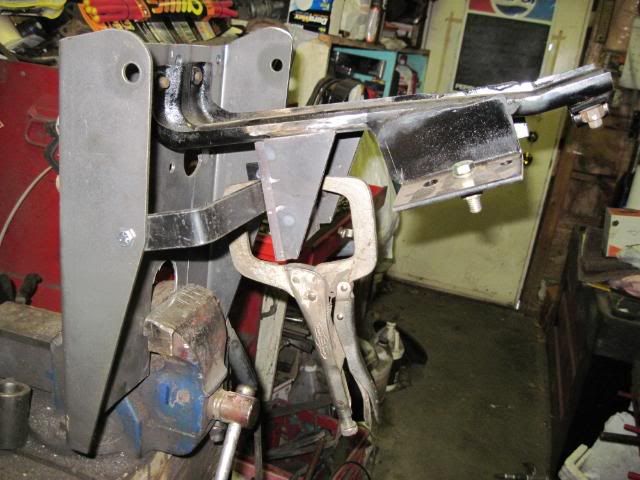
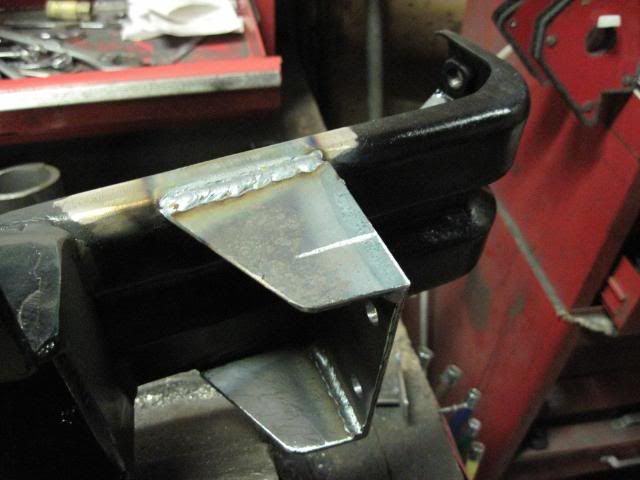
Here is the new mount welded to the support
Image

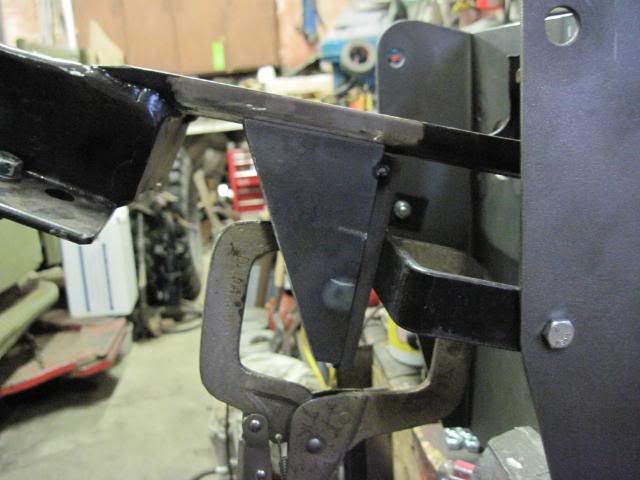
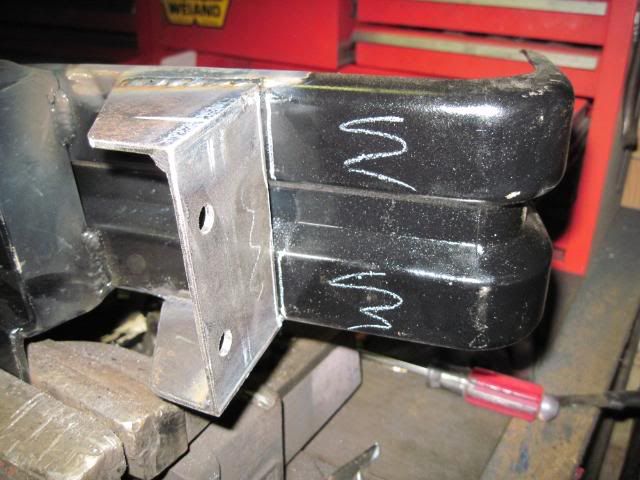
And here is the excess trimmed off
Image
Image

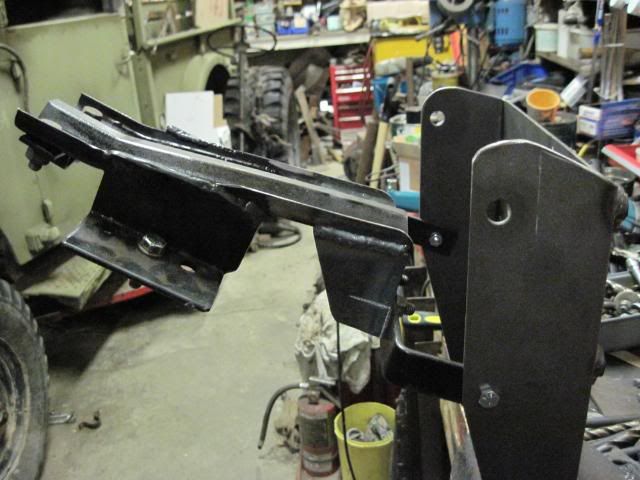
The coloum mount bolts to the pedal stop to make installation of the pedal mount and or coloum support easier.

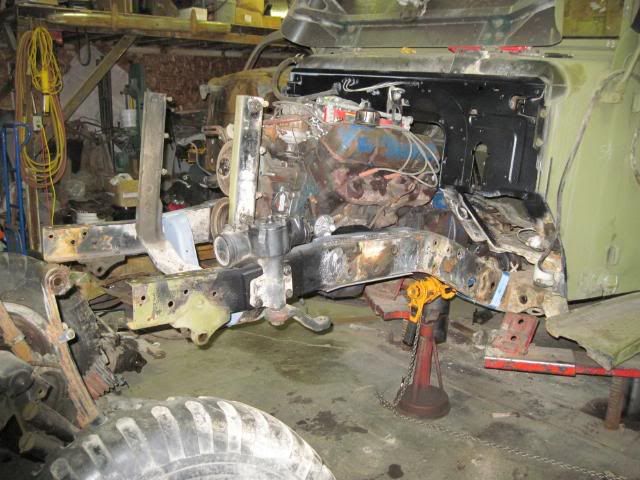
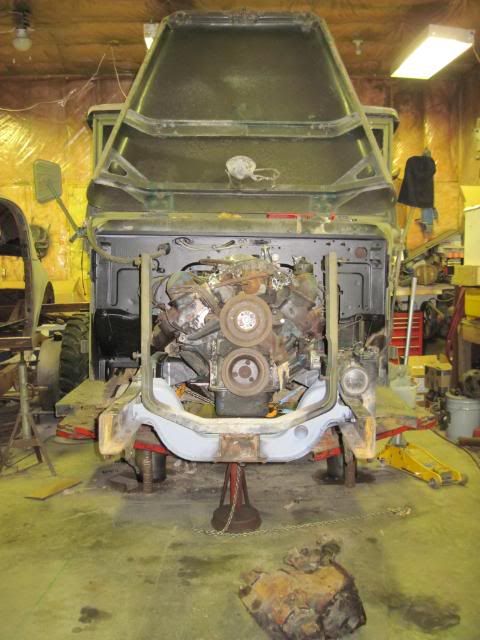
I've also managed to get the rest of the driveline sorted out and repaired.

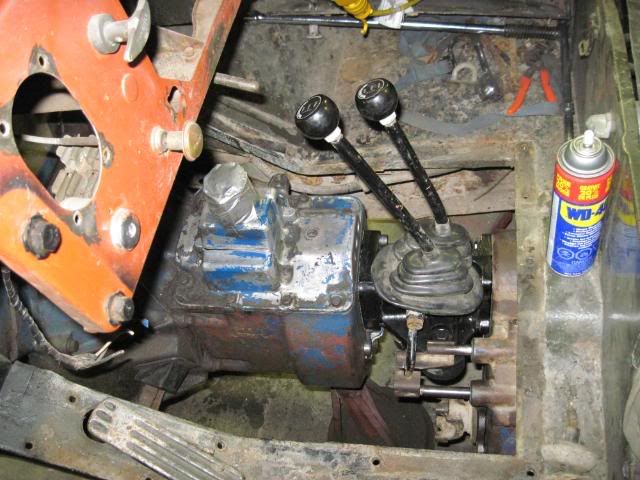
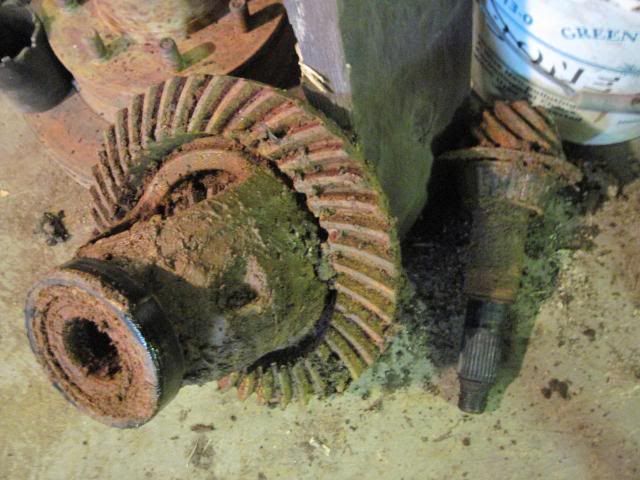
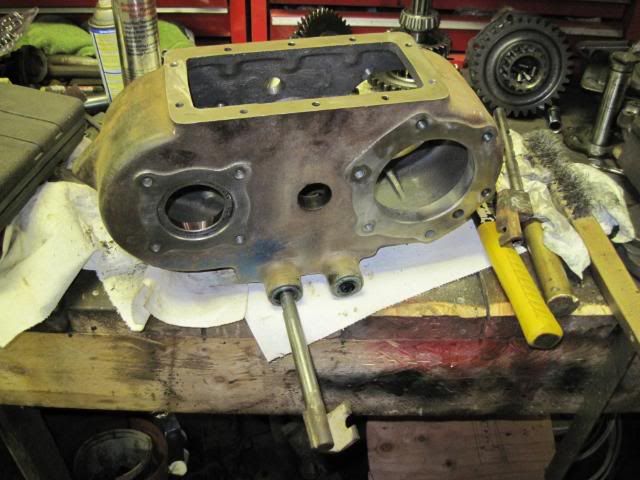
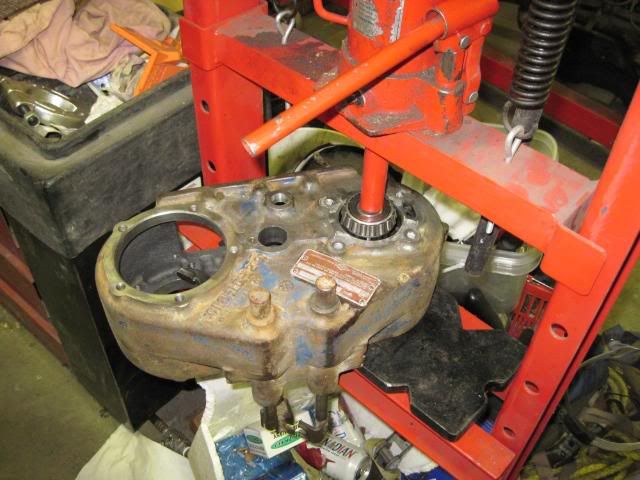
Here is the Ford Dana20 tcase which hangs off the back of the NP435. The drivers side front output will be the new power source for the PTO winch. The tcase has been modified for separate front and rear operation so that I can drive the winch in either hi range or low range with the rear output powered or in neutral. When I don't need the winch, the front output will be in neutral.

I had to disassemble the unit as the previous owner had issues with it popping out of gear after it was rebuilt. Turns out one of the thrust washers on the intermediate shaft had fallen out during the assembly, allowing the gears to walk back and forth under load which caused the issues he described. I also removed the interlock pin between the two shift rails which will allow for the individual controll of the outputs. This was the only mod for the "J" shift pattern D20 to twin stick it. Other tcase like the NP205 require grinding of the shift rails to get the same results.
Image
Image

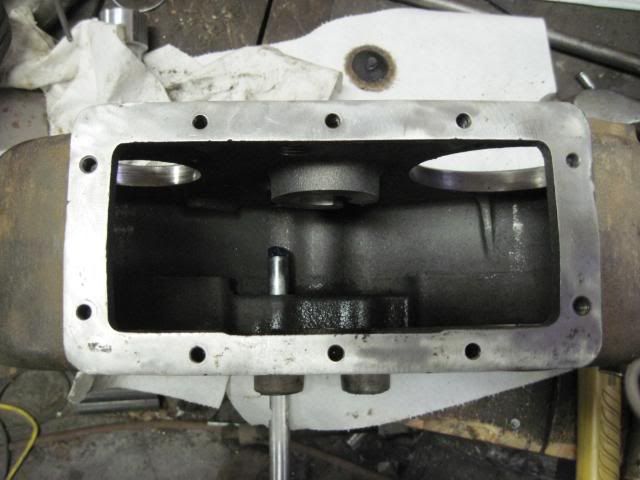
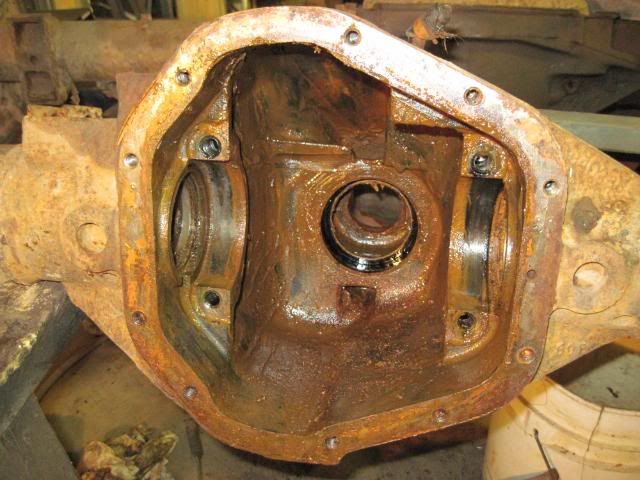
The front output bearing is a light press fit
Image

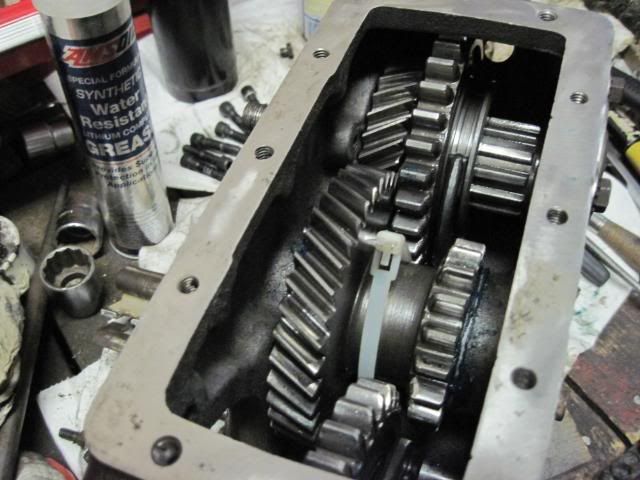
Its easiest to put the intermediate gear assy. in with a large zip tie around its middle. It provides something to hang onto while juggling thrust washers and pushing the shaft through the case.
Image

Here is the case fully assembled with the transmission adapter and the twin stick shifters loosely mounted.
Image

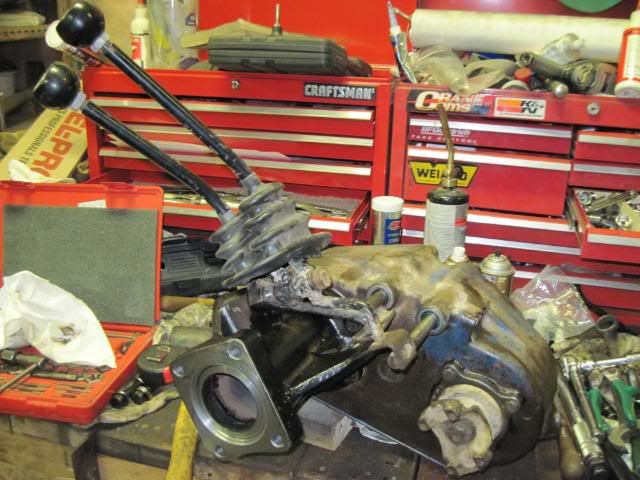
Behind this setup will go the divorced NP205 that I scrounged for a screamin' deal and then its off to the diffs.

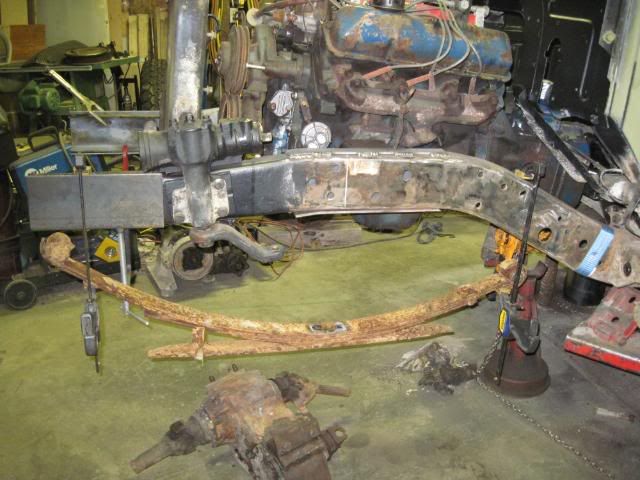
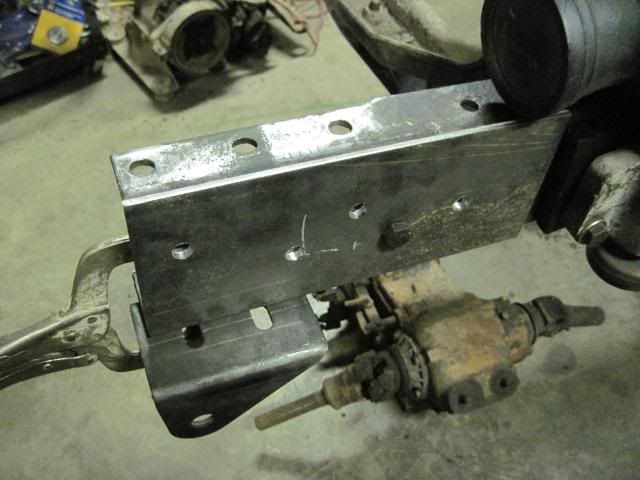
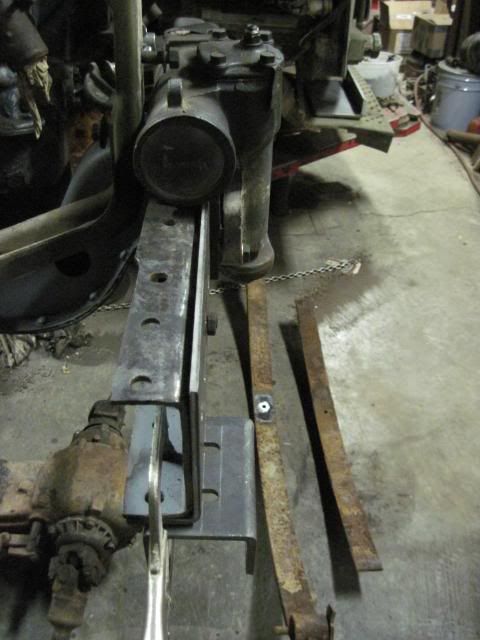
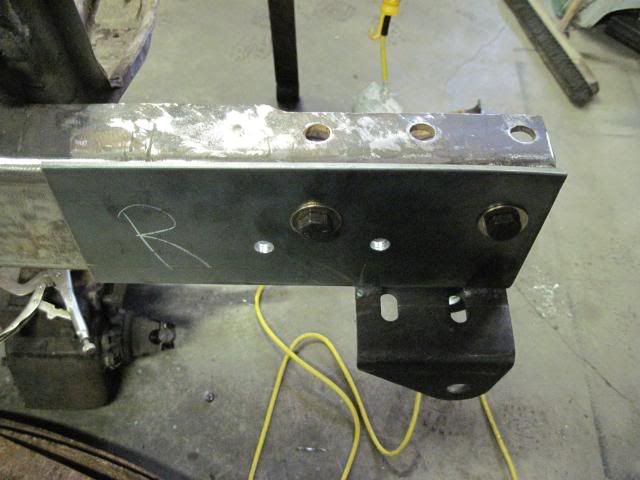
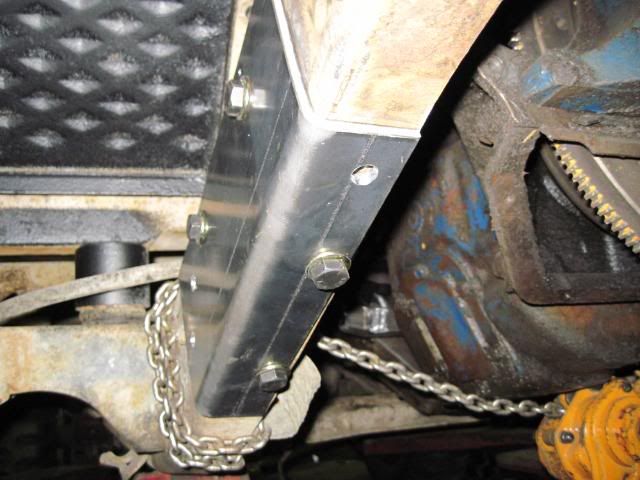
Here are a few shots of the new Transmission crossmember that is in the works to hold the NP435 and D20 up. I used 1-3/4" x 0.120 wall steel tubing - A mount will be fabbed from the middle of the tube to attach to the mounting points in the intermediate housing between the trans and tcase.
Image
Image
Ray
1953 CDN. M37
1954 CDN. M152
Josh
SFC
SFC
Posts: 702
Joined: Tue Nov 06, 2007 9:02 pm

Post by Josh »

so, are you using the D20 for the reduction, or...? Im confused, as now you'd have dual front outputs with the D20 and NP205.
Image
Master Yota
MSGT
MSGT
Posts: 828
Joined: Sun Nov 15, 2009 11:50 am
Location: Prince George BC Canada
Contact:

Post by Master Yota »

The front output on the D20 will go to the winch, as the output is on the driver-side of the truck. The NP435 has the pto port on the wrong side (passenger side) of the transmission to work with the Braden winch, so this seemed like a good idea. I figured I can kill multiple birds with one stone. I have a powered front output to operate the winch - with two range selections (high or low, plus neutral). The rear output on the D20 will go to the NP205 (which will function as a normal transfer case). With the front D20 Output locked in neutral, I can still shift the rear D20 output independently between high, low, or neutral to provide additional gearing. Its basically a poor-mans doubler.

I figure in Double low range I'll have a crawl ratio of about 144:1 - which should turn the tires without hesitation at any time. And when I do get it stuck, I have the ability to turn the tires, and operate the winch at the same time to speed up the extracation. Seems like a win-win setup to me! :lol:
Ray
1953 CDN. M37
1954 CDN. M152
Josh
SFC
SFC
Posts: 702
Joined: Tue Nov 06, 2007 9:02 pm

Post by Josh »

Damn, you sir, are good!

NEVER in my wildest dreams would I have thought of something like that. EXCELLENT idea!! :D
Image
Master Yota
MSGT
MSGT
Posts: 828
Joined: Sun Nov 15, 2009 11:50 am
Location: Prince George BC Canada
Contact:

Post by Master Yota »

Got some more done since the last post - engine trans, and tcase#1 are in, but the trans crossmember still needs to be finished. I can't pick the truck up on the hoist though, as its too heavy on one end, so I made some progress in counterbalancing the front.

Here is the truck with the all the power train removed, including the original tcase...
Image

Here, the engine,trans,and D20 have been put in, the Tcase shifters are in a good location, but need to be shortened
Image

Removed the front axle and original suspension.
Image
Image

Started the mockup of the front springs and hangers. I used 1/4" plate to mount the hangers on, and then the plates are bolted to the frame using the original spring hanger holes. Gusseting of the mounts is still to be done.
Image
Image
Image
Image

This plate will be the mount for the shackle hanger...
Image

I also finished stripping the front Dana 60 down, and have sent it out to have the gear set installed. What a filthy mess this was. I was lucky though, it came apart easy, and no damage has been done to the housing.
Image
Image
Image

More to follow....
Ray
1953 CDN. M37
1954 CDN. M152
Josh
SFC
SFC
Posts: 702
Joined: Tue Nov 06, 2007 9:02 pm

Post by Josh »

yuck! That D60 is trashed. I think I'd try to find another, or, a 14B GM axle to replace it rather than trying to fix that mess.


Looks great otherwise!
Image
NebM37
PVT
PVT
Posts: 27
Joined: Thu Jun 11, 2009 4:07 am
Location: Nebraska

Post by NebM37 »

Actually... looking at the picture it looks like the carrier bearings never spun. So if they haven't, that housing is perfectly good most likely. Getting it clean being the major hurdle to overcome.

The project is looking good, can't wait to get started on mine.


Norm
Josh
SFC
SFC
Posts: 702
Joined: Tue Nov 06, 2007 9:02 pm

Post by Josh »

I agreen, it could be saved, but, around here, D60 rears are $100 all day every day in the bone yards. Bearings alone cost that.
Image
Master Yota
MSGT
MSGT
Posts: 828
Joined: Sun Nov 15, 2009 11:50 am
Location: Prince George BC Canada
Contact:

Post by Master Yota »

Josh - that was the front D60 axle that was filthy. And you're correct, if that had been a rear 60 it would have gone to the scrapper.

All I needed was the housing anyway - It was loaded with new everything, from the 4.56 gears, bearing, seals, and a detroit. Its all new now... :D
I've got a spare set of good shafts to go in, and then its on the putting the knuckles back together with all new seals and bearings and hubs and such...

The work never seems to end, but I think I'm imagining the light the at the end of the tunnel. Somebody pointed out to me that I have about 10 weeks until I need the truck. Nothing lights a fire under the ass like a deadline! :cry:
Ray
1953 CDN. M37
1954 CDN. M152
Josh
SFC
SFC
Posts: 702
Joined: Tue Nov 06, 2007 9:02 pm

Post by Josh »

ahhh, didnt realize it was a front, I assumed it was a rear. In that case, yeah, I dont blame you for salvaging it.
Image
Master Yota
MSGT
MSGT
Posts: 828
Joined: Sun Nov 15, 2009 11:50 am
Location: Prince George BC Canada
Contact:

Post by Master Yota »

Well, I had the 60 under the truck yesterday, and promptly broke one of the 5/8s bolts off in the spring mount on the D60.:x After cursing for several minutes, I figured it was best to sharpen up a few drill bits and get it out. An hour later I was a much happier guy...

For a short while anyway...

I had decided that with the D60 now functioning as a counter weight, it was time to put the truck up in the air and keep working. After setting up the hoist, I pulled the control valve and tried my very best launch the truck through the ceiling of the shop (12'). The hoist literally went from the floor to almost full extension in under a second or so. I could actually see daylight between the hoist and the truck at the 6 foot mark. 6500lb trucks are not supposed to launch like a catapault!

After it settled out and I had checked my britches for debris, I started to work on the transmission crossmember, having given the truck a good shake to make sure it was stable. As I was was cleaning up an hour or so later, it decided to drop about 2 feet. Had to check my drawers again. :(

Seems the old hoistl is low on oil - air pressure travels alot faster through the controls than oil does, so that explains the shooting up, and once the pressure drops, the hoist will settle, which explains the sudden drop.

There is now 10 gallons of hydraulic oil sitting on the floor in pails ready to go in. :idea:

I'm still going to die two years earlier though, a fright like that must shorten ones life in someway!... :cry:
Ray
1953 CDN. M37
1954 CDN. M152
Josh
SFC
SFC
Posts: 702
Joined: Tue Nov 06, 2007 9:02 pm

Post by Josh »

please tell me it has a dead man's block to stop it from coming (completely) down! :shock:

I gotta admit, I LOLed reading that :lol:
Image
Master Yota
MSGT
MSGT
Posts: 828
Joined: Sun Nov 15, 2009 11:50 am
Location: Prince George BC Canada
Contact:

Post by Master Yota »

IMS the gear train that keeps the two rams operating together is supposed to act as the "dead man" stop should it start to drop. And it pretty much did that, keeping the truck from smashing into the floor. However if I had been under it, I probably would have gotten the bottom of the trans in the top of my mellon. While I have napped on the garage floor before, thats not the way I usually like to start!

After dumping 10 gallons of oil in the unit, it lifts great to about the 3' mark, then I can feel the oil foam up in the control valve and the air start to take over. Looks like it'll need another 10 gallons or so. Must have an underground leak in the tank or one of the pipes. Its a slow leak though, as I haven't put any oil in it for several years now so its not worth digging it out to fix it. It would be cheaper in the long run to install a new two post electric unit.

I don't think there is too much I could put under that hoist to act as a secondary dead man stop that wouldn't be folded up or shot out like shrapnel with that much weight over it...

Managed in the mean time to get the transmission crossmember assembled and should be ready for installation today. Next is on to tcase number two!...
Ray
1953 CDN. M37
1954 CDN. M152
hbb
SSGT
SSGT
Posts: 282
Joined: Fri Jun 26, 2009 6:59 am
Location: Buckeye,AZ

Post by hbb »

Yota;
I have been in your shoes with the rivets, what I finally had done is ground the heads smooth with the frame and soaked the area with AreoKroil penetrating oil, that can be found at industrial sales or at most welding supply stores, after that has soaked I heated the metal around the rivet then I used a air hammer with a pointed head and drove them out! I was fighting rust like you are. But I think the heat is the biggest thing that helped.
I worked at a power plant where everything is rusty and corroded, that is a method we used a lot there too.
Good luck and watch the fingers!
hb
The wiseman who listens to his students stays a wise MAN!
Post Reply