Page 1 of 13

Project: Old Guard - lots of pictures

Posted: Mon Dec 07, 2009 11:15 pm
by Master Yota
I thought I would share with all you fine gearheads the buildup of my 53 M37. Here is as it sits today, and some of what I managed to accomplish. I've been fortunate enough to start with a complete truck in good condition. If I could have found a basket case to modify I would have gone that route, but alas, there wasn't one to be found so this one had to step up.

My plans include an engine swap to big block power, Np435, possibly a doubler, a Dana 60 front, Corporate 14bolt rear, and crossover steering just to name a few things.

If anybody see's any stock parts they are in need off, I will not be reusing alot of this stuff. Just ask and I might have what you need.

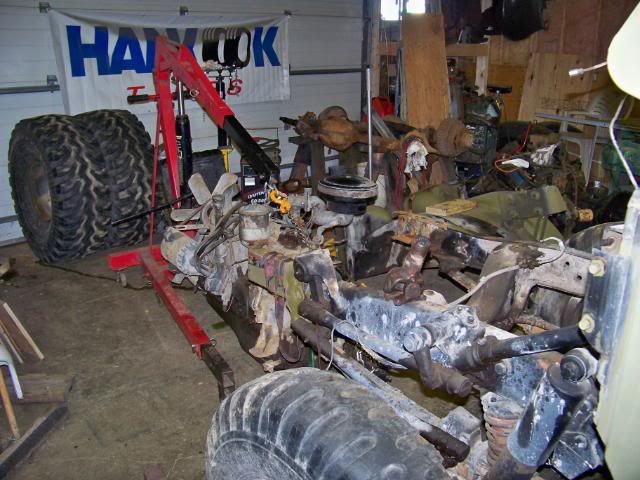
The old "Big Block" (Cdn. 251ci.) and trans is out and now there is room for the new Big Block and trans
Image

Image

Image

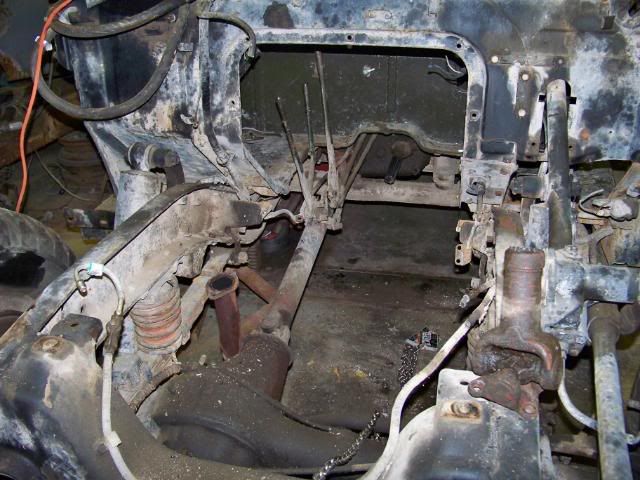
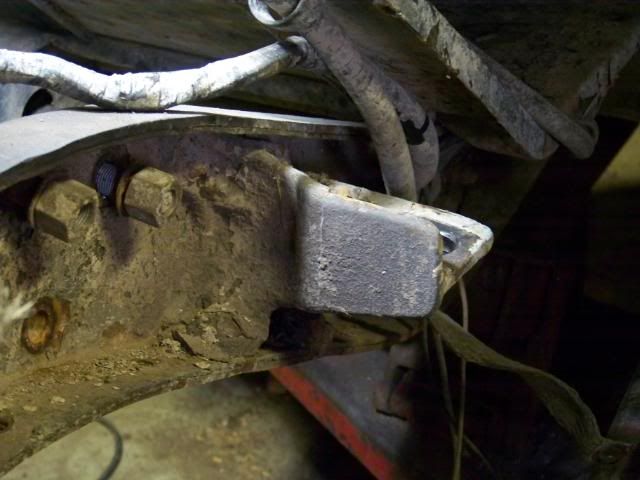
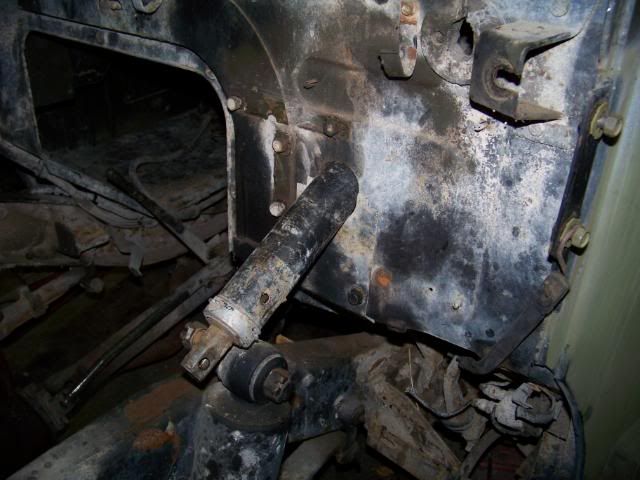
Here is a shot of the original steering linkage:
Image

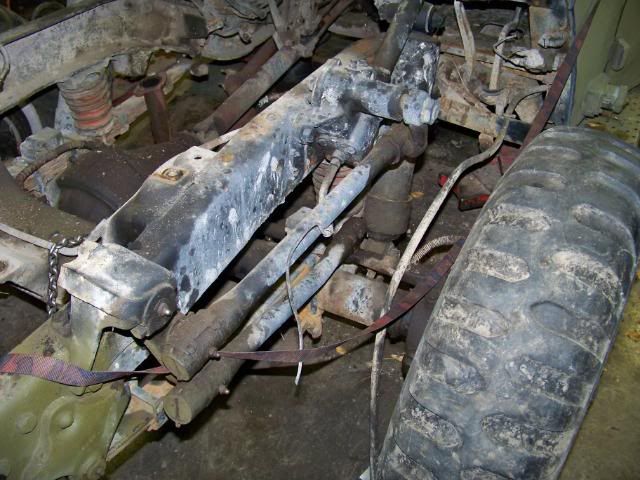
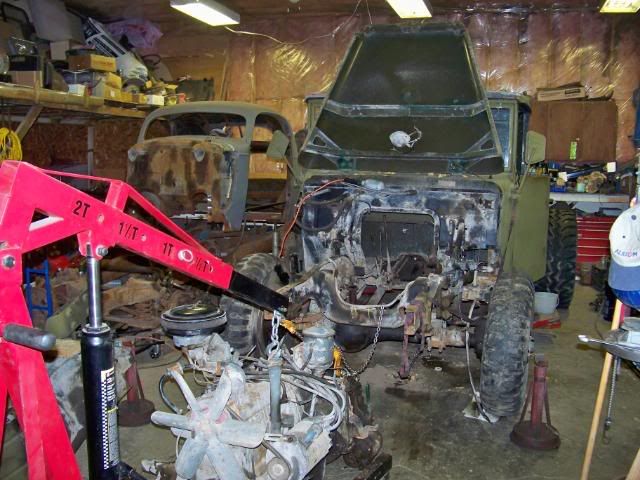
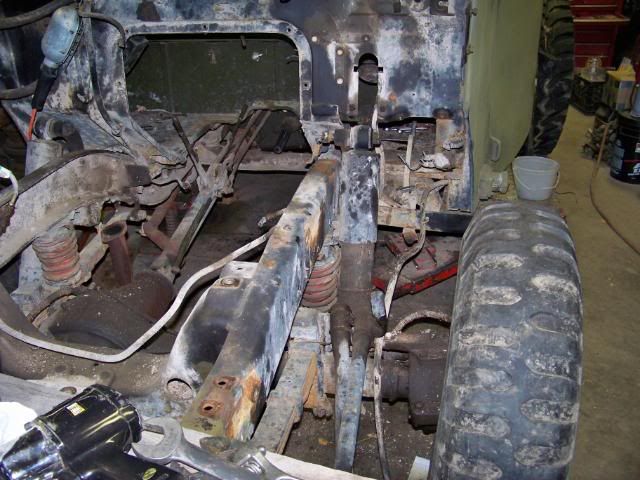
And all the room I get to play with after I removed it. A cross-over steering box will do the steering duties from now on.

Image

Naturally the driver need some type of mechanism to turn the steering box, so a new coloum had to be installed, and that inturn meant some mounts needed to be fabbed up.

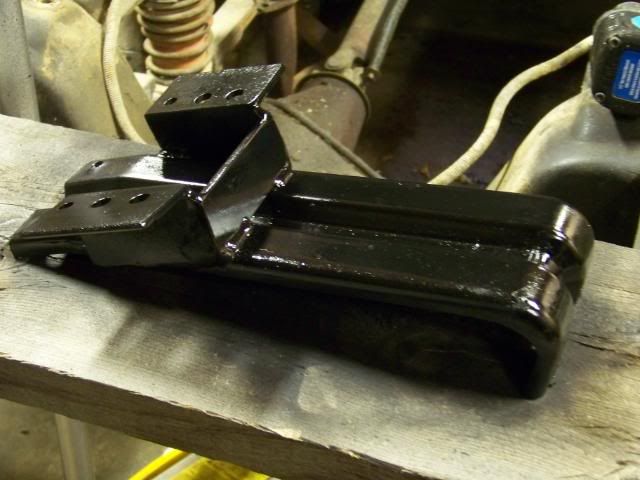
This is the original under-dash coloum support with some new mounts tacked on the side of it to hold the new coloum.
Image

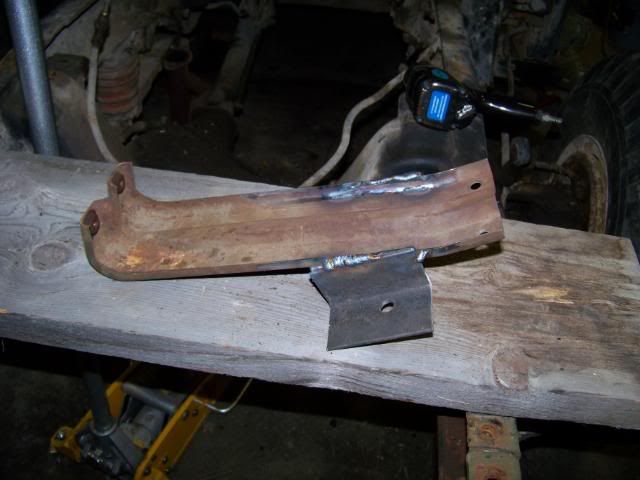
Fully welded with some additional support and freshly painted. I drilled a few extra adjustment holes in the mount so that I had some wiggle room to adjust the coloum if needed.
Image

The original dash cover needed some massaging to fit the new coloum - the chalk lines indicate where I had to cut the plate. A jig saw with a metal blade worked wonders. This plate is at the very limit of my air nibbler. The saw worked much better.
Image

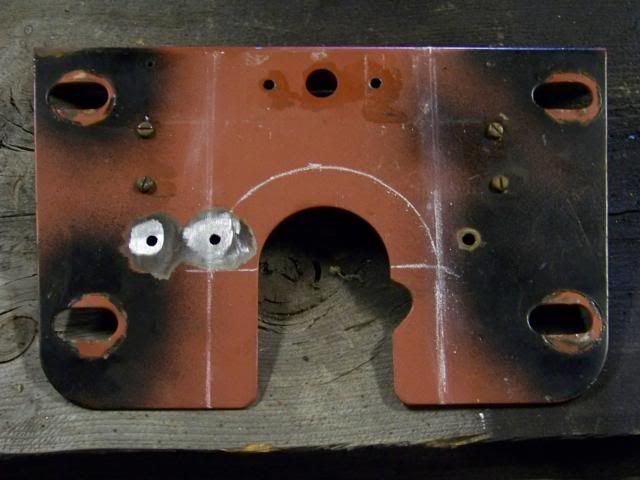
Some fresh paint on the cover as well.
Image

No pic with the cover installed, but viola! - tilt steering.
Image

And the coloum comes out at the factory angle, and in the factory spot - which means no body work for me ! Ya!!
Image

I also started to play around with my tcase's tonight - looks like I might be in for a PIA setup - but at the moment its too early to tell.

Posted: Tue Dec 08, 2009 2:34 am
by HingsingM37
Looks like quite the fun project. Thanks for posting the pics and enjoy your M :)

Posted: Tue Dec 08, 2009 6:22 am
by k8icu
It looks like a fun project. Just so you know you will have to modify the front suspension to put the dana 60 in and you will have to play around with the spring pearches to put the GM 14 in the rear. It's not a direct swap like on a M715, but not impossible either. Here is my truck in it's very very slow stages of rebuild.

http://www.leathernaturally.com/m37project.htm

I'm up to two pages.... Started body work on my cab and will hopefully be posting pics by the end of Jan.... :) I also hope to get my frame out to the media blaster right after the holidays.

Keep your pictures coming!

Posted: Tue Dec 08, 2009 3:31 pm
by Lifer
The column installation looks great....except for one small detail! That Chevy "bowtie" on the steering wheel looks kind of out of place. You shoulda used a Dodge steering column! ;)

Posted: Tue Dec 08, 2009 8:04 pm
by Master Yota
Lifer wrote:The column installation looks great....except for one small detail! That Chevy "bowtie" on the steering wheel looks kind of out of place. You shoulda used a Dodge steering column! ;)
(Shush...It'll be our little secret... :wink: )
I could always cover it with a decal, or just swap a mopar wheel onto it... 8)


I've already got new spring hangers for the front, and will mount them outboard to match the GM D60 perches. As for the rear, I'll just burn some new perches to the 14 bolt and call it done.

As I was looking at the stock front diff last night, I noticed that it dosen't seem quite 90* perpendicular to the frame. Upon further inspection it would appear that the center pin in the left front spring pack is sheared off, the axle is moved back about 1/2 an inch. Not a big deal, as its all comming apart anyway, but its nice to know for safety sake. Now I'll pay more attention to the leaf pack as I remove the diff, knowing that nothing is holding it together.

Posted: Wed Dec 09, 2009 7:32 am
by Captnsim
Great stuff! 8)
If the rest comes out as nice as that column swap, your going to have one sick truck.

251 c.i engine

Posted: Fri Dec 11, 2009 7:23 pm
by m37jarhead
Hey Yoda,
I'm looking for a good Canadian 251 engine. Mostly a good block.
What parts and pieces do you have?

M37jarhead
email direct at: m37jarhead@yahoo.com

Posted: Sat Dec 12, 2009 5:03 am
by Lifer
I just looked through the pics again and noticed your truck has coil "overload" springs on it. Why?

Posted: Sat Dec 12, 2009 11:16 am
by Josh
so, what's the powerplant of choice for it?

Posted: Sat Dec 12, 2009 12:45 pm
by Master Yota
Lifer - I have no idea why the coil overloads are there. I didn't put them in and won't be keeping them. The air bag inserts are holed and the coil looks like it came out of an atv. The truck was a winch equiped truck - maybe the front was sagging a little.

Josh - The power plant of choice is a '69 428 CJ. I know its not the usuall powerplant, and I'm sure that 'ol Henry will rollover in his grave every time I start the truck, but I know it'll be fun! It'll be coupled to an NP435 and then off to the stock tcase for power distribution. Its not a radical engine, but it makes an honest 400 ponies and more than enough torque to get the job done.

Jarhead - The engine is complete - Trans ouput to Fan, air cleaner to drain plug and everything inbetween. I've never started it, but it was last insured in '04. The engine appeared clean and in well kept condition. Even the oil was still clean. Only leaks seemed to be along the oil pan seal.

I don't have much to add in new work done other than I hate rivets.... :cry:

Posted: Sun Dec 13, 2009 6:59 pm
by Master Yota
I hate Rivets; and I'm not talking about the rivets used to hold sheet metal together either. I'm refering to the "put it together forever" rivets. I've been trying to remove the transmission crossmember mounts from the frame for two days now so that I can have extra room for exhaust and PTO shafts and clutch linkage.

There is one on either side of the frame rail:

Image

Its held on with these wonderfull little pieces of hardware:

Image

I've managed to get one out so far - only seven more to go. :evil:
Cut the heads off, drill 'em, bang on them with an air hammer till your hand goes numb, then smack the mount with a BFH untill one pops out.

Lucky me. :cry:

Posted: Sun Dec 13, 2009 7:05 pm
by W_A_Watson_II
Grind the head a little, enough to get a good centered flat. Center Punch it, the grill an 1/8" hole 2/3's the way through. then drill a 3/8" bit until the rivet flies out, or your at the end of the 1/8" drill depth, and punch through.

Posted: Sun Dec 13, 2009 7:09 pm
by Master Yota
W_A_Watson_II wrote:Grind the head a little, enough to get a good centered flat. Center Punch it, the grill an 1/8" hole 2/3's the way through. then drill a 3/8" bit until the rivet flies out, or your at the end of the 1/8" drill depth, and punch through.
I envy you if yours came out that easy. Thats the technique I've been using, and they just don't want to release. I will prevail though - I have patience...

Posted: Sun Dec 13, 2009 7:57 pm
by cuz
I use the grind off the head game and then a pointed punch in the air hammer to knock them out. If that doesn't work it is usually because the shank has had a chance to expand in a small gap between the joined materials when originally installed and the only answer then is to drill all the way through it.

Posted: Mon Dec 14, 2009 12:16 am
by Master Yota
cuz wrote:I use the grind off the head game and then a pointed punch in the air hammer to knock them out. If that doesn't work it is usually because the shank has had a chance to expand in a small gap between the joined materials when originally installed and the only answer then is to drill all the way through it.
That seems to be the challenge that I'm facing right now...