Page 1 of 1
carberator cleaning ?
Posted: Thu Sep 04, 2008 6:20 am
by peter e mark
Hello engine efficiency officianados, and todays question for the shade tree mechanic is: What are you actually cleaning when you " clean the carberator"? I admit to being able to spray that carb cleaner product, with engine running, into the throat of the carb ... But I hear people talking about "jets" and "sticking floats" ? What is the actually included in this claening proceedure?
Carb cleaning
Posted: Thu Sep 04, 2008 8:11 am
by Nickathome
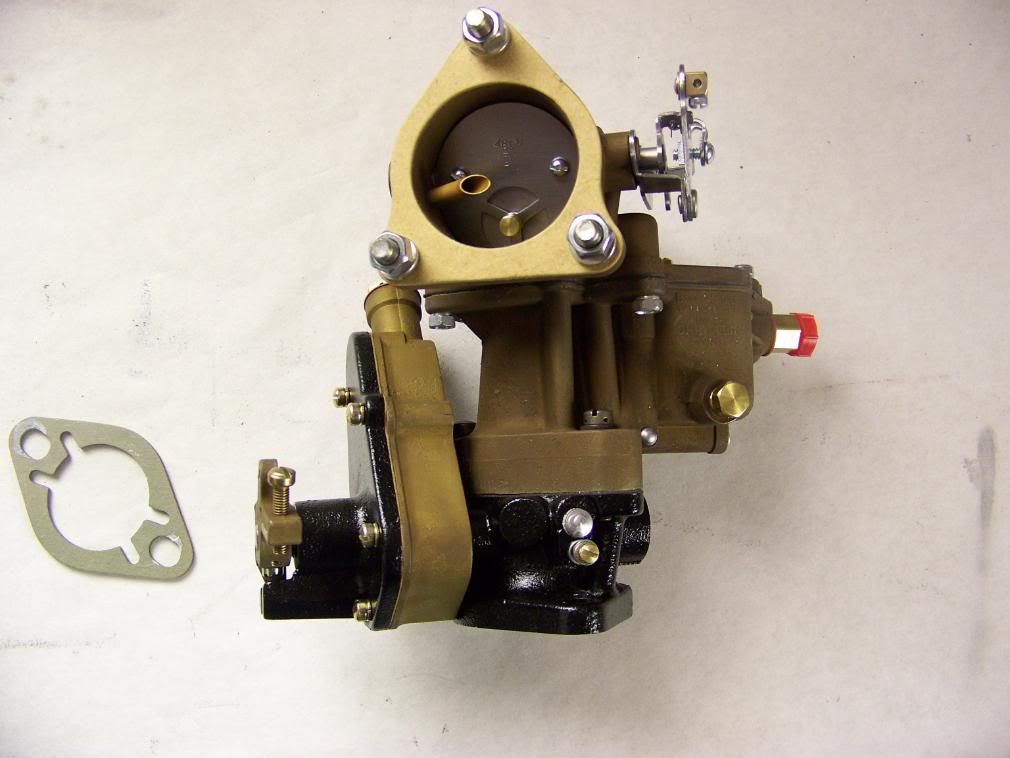
When I rebuilt my carb I put the disassembled core and top piece into a batch of carb cleaner and let it soak, which allowed the cleaner to access all the little ports and jets to clean them out. I then hit all the pieces with high pressure air from my compressor to dry things out before reassembly using the new rebuilt parts kit I had bought.
Posted: Thu Sep 04, 2008 9:36 am
by k8icu
When you clean a carb you want to get anything out that might cause the device to work less than properly. Cleaning gets dryed or varnished fuel out of passages and off of the needles or jets. (The devices that allow the correct amount of fuel and air to enter the cylnders.) Trucks or cars that sit like ours do (unless you drive one daily) have the fluid or fuel sit and it dries up and causes problems to the carb and the performace. Cleaning the carb gets those things flushed out.
Posted: Thu Sep 04, 2008 11:41 am
by Cal_Gary
If you pull the top of the carb off you'll see the two-barreled float, needle valve and all the other internals. The carb jet is positioned under the float. Be very careful if you decide to take a look-see, as there are a number of small brass parts contained within, and you don't want to damage any of them.
Gary
Posted: Thu Sep 04, 2008 7:30 pm
by peter e mark
Thganks cal_gary...Sounds like one of those repairs requiring a measure of sobreity...
Posted: Fri Sep 05, 2008 4:19 am
by knattrass
Peter - I had every intention to rebuild my carb.... until the rebuild kit showed up. Zach and I saw little springs, ball bearings, widgets, and that was enough for us to say "not". We had to weigh the $55 kit cost plus time and materials - plus it was winter - meaning we would have to do it in the basement. The first wiff of solvent - we'd be looking down the barrel. She was already tee'd about us cooking the 5 gal jerry can in the oven! We ended up using Jim Wallace in Florida for $195. Geez - there is no way we'd ever come close. The biggest advantage was that we simply bolted on the carb from Jim and "perfect". Our biggest fear of doing it ourselves was we wouldn't know it was right until it was installed.
Posted: Fri Sep 05, 2008 5:59 am
by Cal_Gary
I, too, ended up having difficulty rebuilding mine, and eventually got a rebuilt gem from John Bizal at Midwest.
Gary
Posted: Fri Sep 05, 2008 6:36 am
by peter e mark
Thanks Cal_Gary. I too spoke to Big John who voiced the following words of wisdom: " If it ain't broke, don't touch it"...Well, I accomplished a much simpler tast, the mounting of my 6" vice on the front bumper support, and am ready for other earth shattering restoration procedures....
Posted: Mon Sep 08, 2008 5:54 am
by Cal_Gary
I've been looking for the right vise, too, and am still looking. Priority right now is to finish my wiring harness install-almost there, still need to get the high beams and brake lights working....
Gary