Page 12 of 19
Re: Building a retro M37
Posted: Sat Mar 31, 2012 5:31 am
by T. Highway
Nice job on the intercooler tube, this project is coming along nicely.
Bert
Re: Building a retro M37
Posted: Sat Mar 31, 2012 7:14 am
by retiredguy
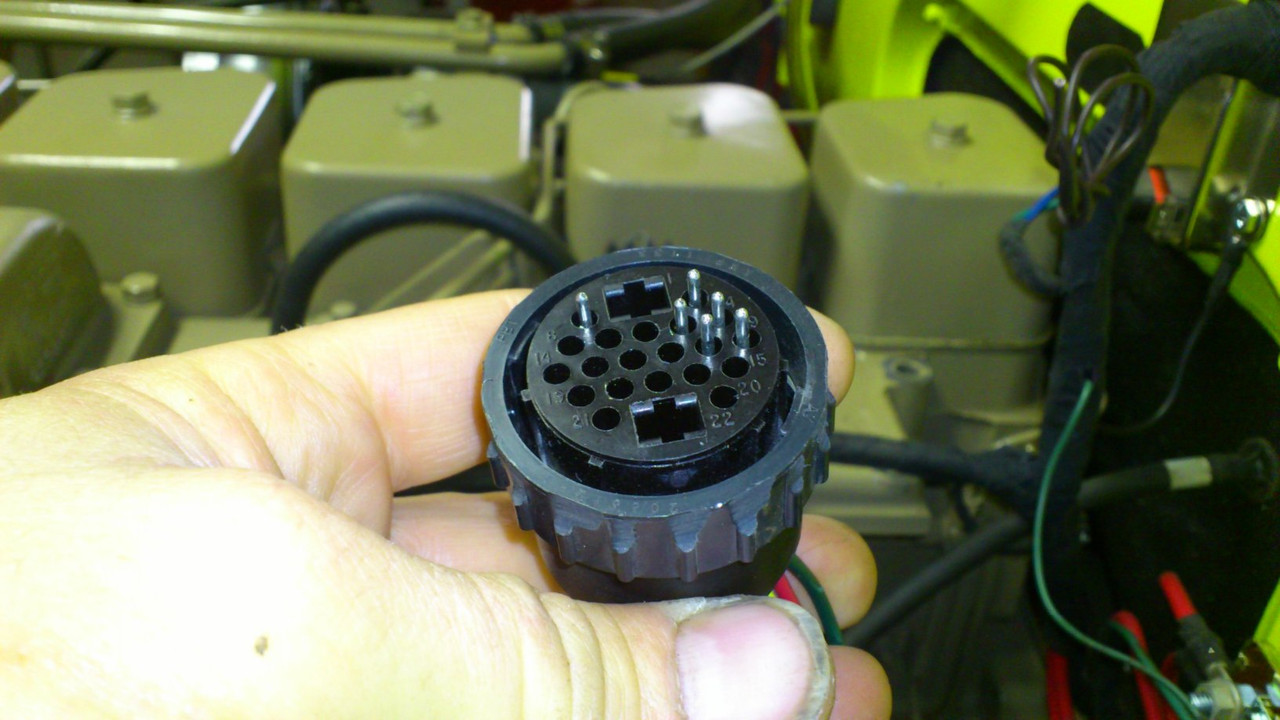
Here you go M37UK. I bought the plugs at a company called MRO Electronic Supply in Edmonton.
http://www.mroelectronics.com/mro/cms.php?id_cms=4
They are working on their website and it is hard to find some parts. I went to their store and found this one on the shelf. The brand is a AMP part and the number is 206613-1 and 206612-1. I liked them because they have 20 small pins and 2 large pins. That way I could run my fuse box power supply though the firewall plug. The pins are numbered on both sides so that makes it easier to work with. The pin part numbers are 66099-2 and 66101-3. The large pins are 66261-2 and 2-66740-1. Here is a picture of the plugs. Oh ya the small one is a military plug they had that I am using to plug in the windshield wipers. That number is 206612-1.
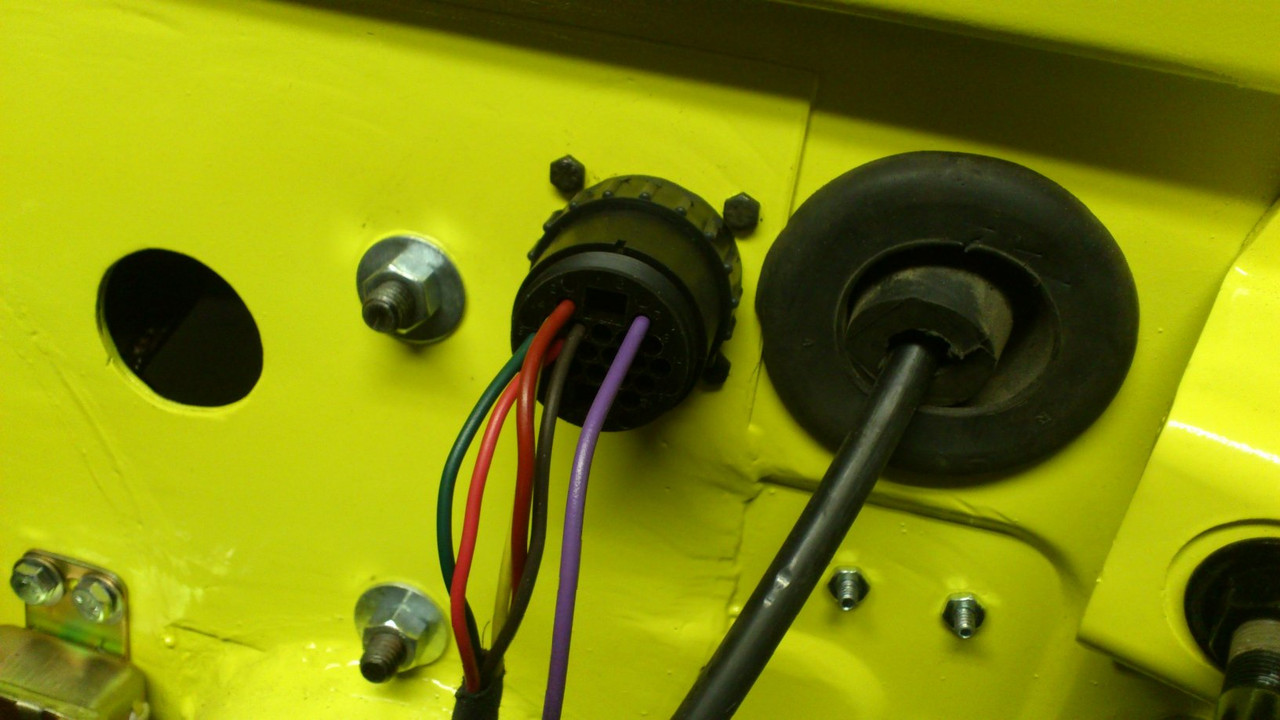
Here is the dash as it is now
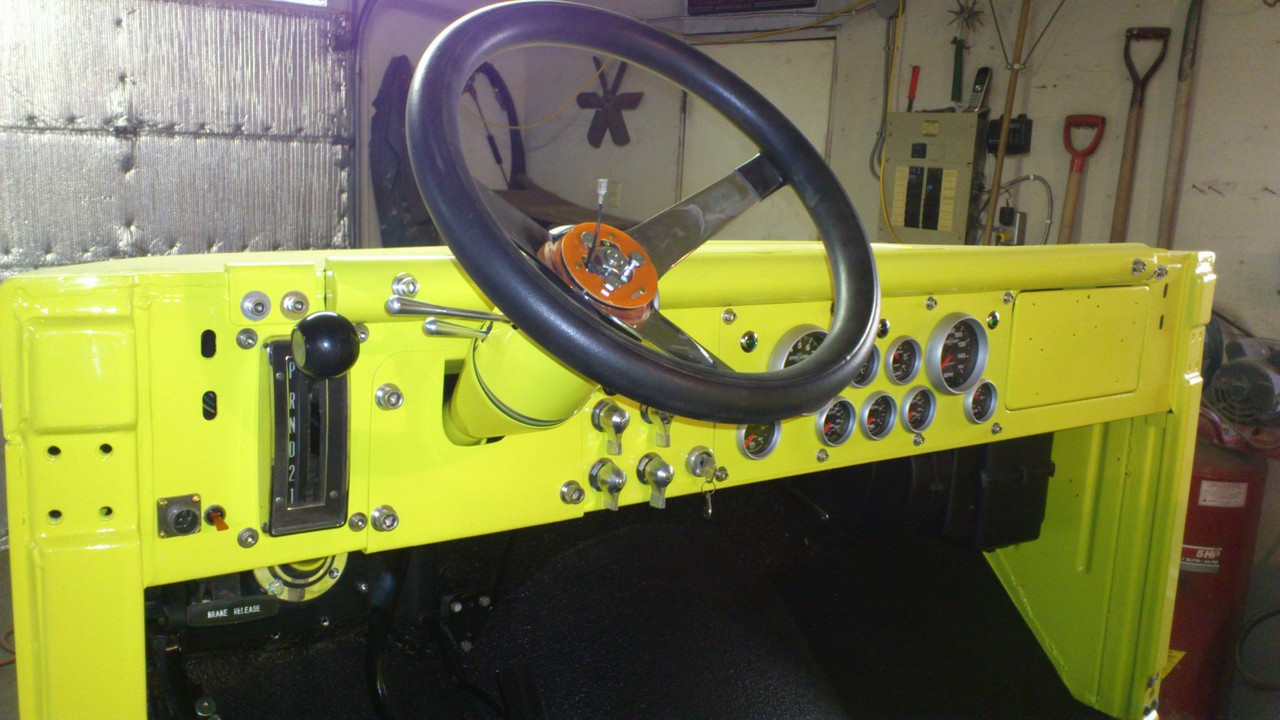
I sure like it when you do your tests on your electrical and all your planning is correct. Lot of wires to think about!
Re: Building a retro M37
Posted: Sat Mar 31, 2012 12:21 pm
by M37UK
Thanks for such a detailed reply, I will have a look at their website.
Cheers
Stu
Re: Building a retro M37
Posted: Sat Apr 07, 2012 6:22 pm
by retiredguy
Well today things got real exciting. Finished building the brake lines and the power steering hoses. Bled the brakes, filled and bled the power steering and topped off the tranny. Did a in shop test to make sure everything worked and took her for a short spin. Body parts are at the sandblaster, parts are in transit from Midwest Military and Vintage Powerwagon. here is a video of the first drive.
http://www.youtube.com/watch?v=kPFR-WWkrtM
Re: Building a retro M37
Posted: Sat Apr 07, 2012 9:49 pm
by SOTVEN
ITS ALIVE!!! ITS ALIVE!!!!

WOW! THIS DRIVE MUST HAVE BEEN SO EXCITING, I CAN ACTUALLY SEE IT IN YOUR FACE EXPRESSION MY FRIEND!! I AM GLAD EVERYTHING WORKED OUT AS YOU EXPECTED! I BET YOUR TRUCK WILL BE STANDING OUT OF THE CROWD FOR SURE! I NOTICED HOWEVER THAT IF YOU INSTALL THE TOP, YOU MIGHT HAVE A SLIGHT ISSUE WITH YOUR GARAGE DOOR HEIGHT. THANX FOR SHARING THE VIDEO

Re: Building a retro M37
Posted: Sun Apr 08, 2012 4:29 am
by T. Highway
Excellent video of the first trip out of the garage.
Bert
Re: Building a retro M37
Posted: Tue Apr 10, 2012 9:17 am
by k8icu
I bet your still smiling. Now you have to build a new garage so you can get it in and out of the garage once it's finished...
Re: Building a retro M37
Posted: Tue Apr 10, 2012 10:01 am
by retiredguy
Oh ya. Still smiling. Now its getting real interesting with all the new parts arriving and things getting painted. As for the shop door, yes its a 7ft door and the truck is 7 foot 3. I'll be driving it out without a top on and windshield down. My other garage attached to my house has a 8. Ft door so I am ok. To work on it later I have a set of old rims that i'll use to get it in and out in the future.
Re: Building a retro M37
Posted: Tue Apr 10, 2012 12:12 pm
by HingsingM37
Sweet! Very nice work indeed.
Re: Building a retro M37
Posted: Wed Apr 18, 2012 7:27 am
by retiredguy
Re: Building a retro M37
Posted: Wed May 02, 2012 9:18 am
by retiredguy
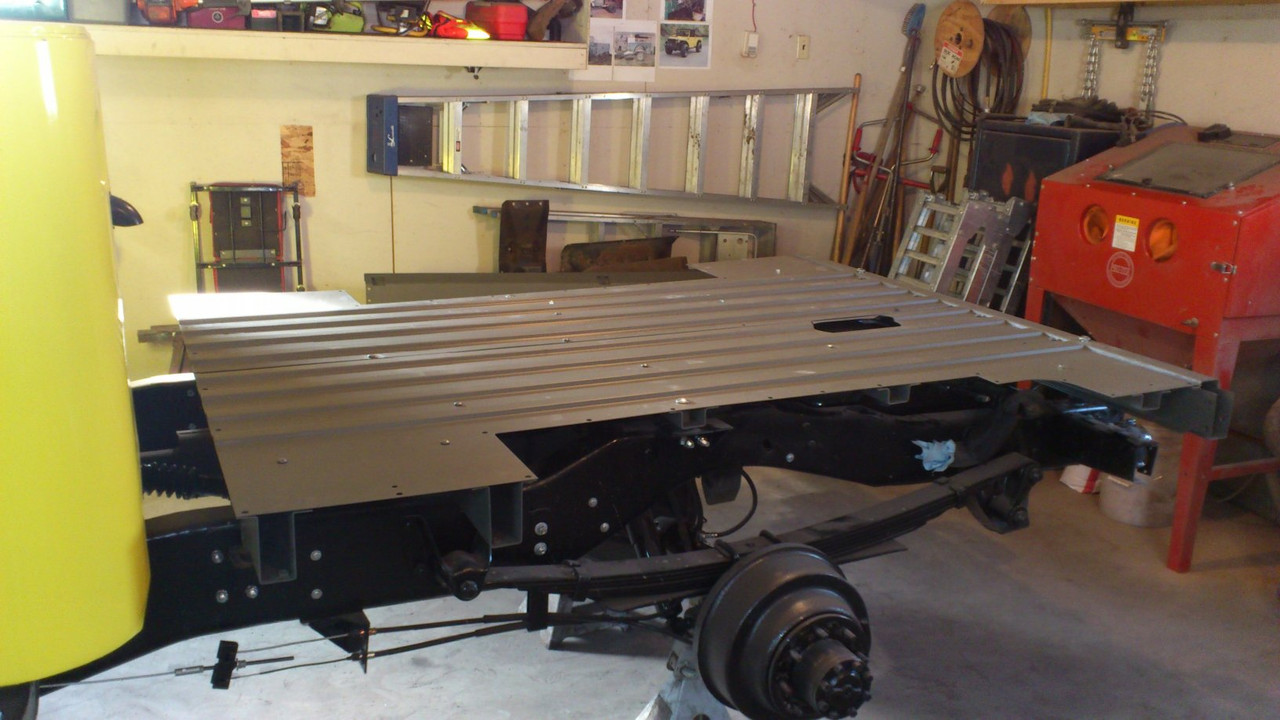
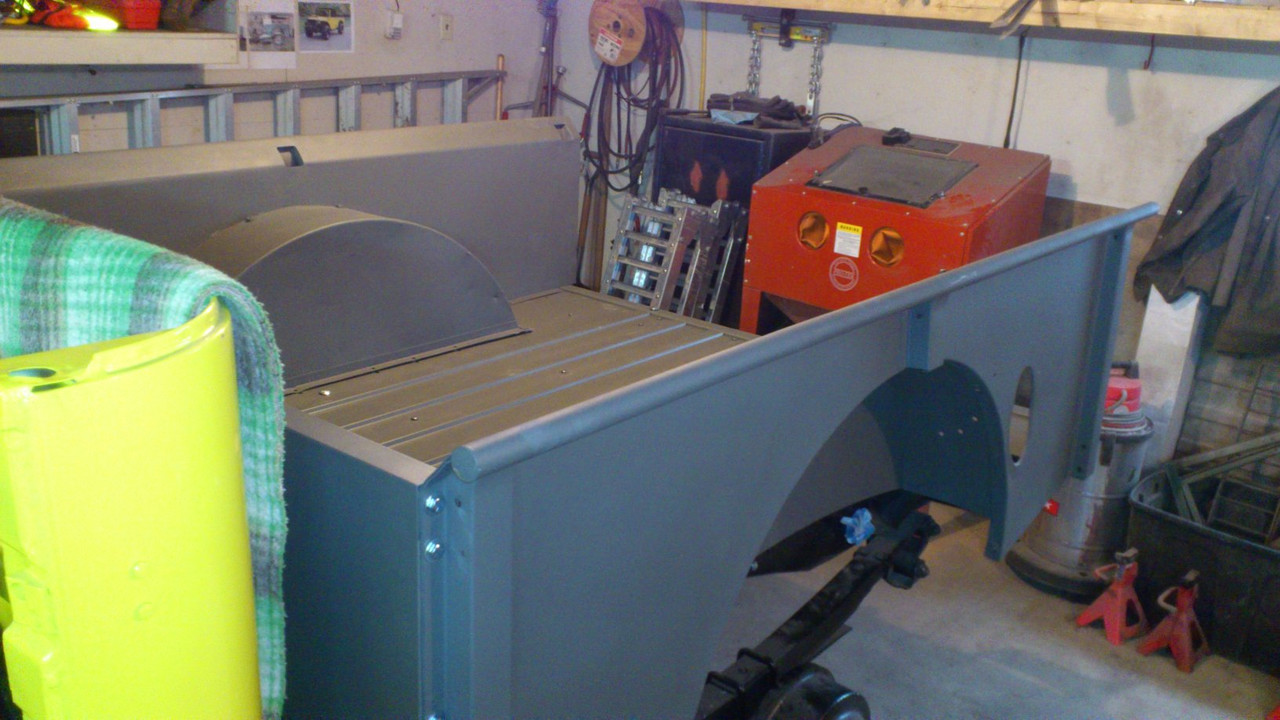
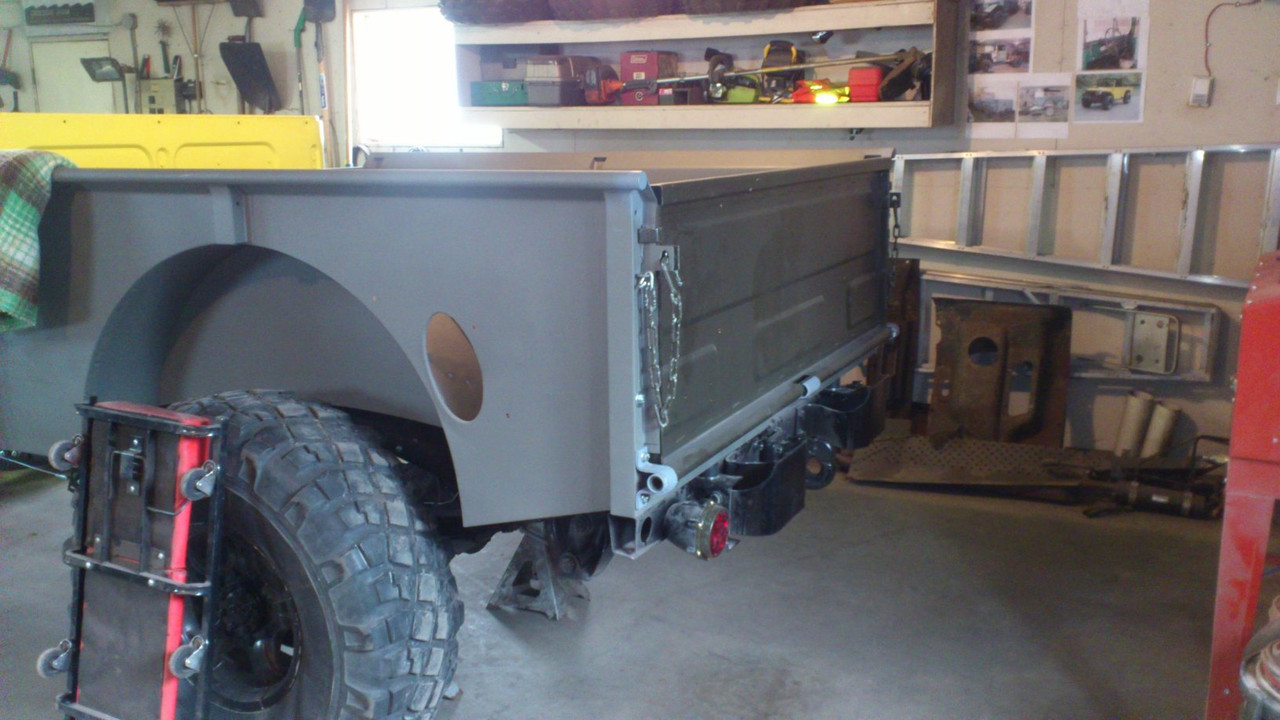
Well I got the box assembled. I must say the parts I got from MWM fit excellent. Have it assembled waiting for paint. The front end is out for paint right now and I will post pictures of that installed. here is a pic of the box
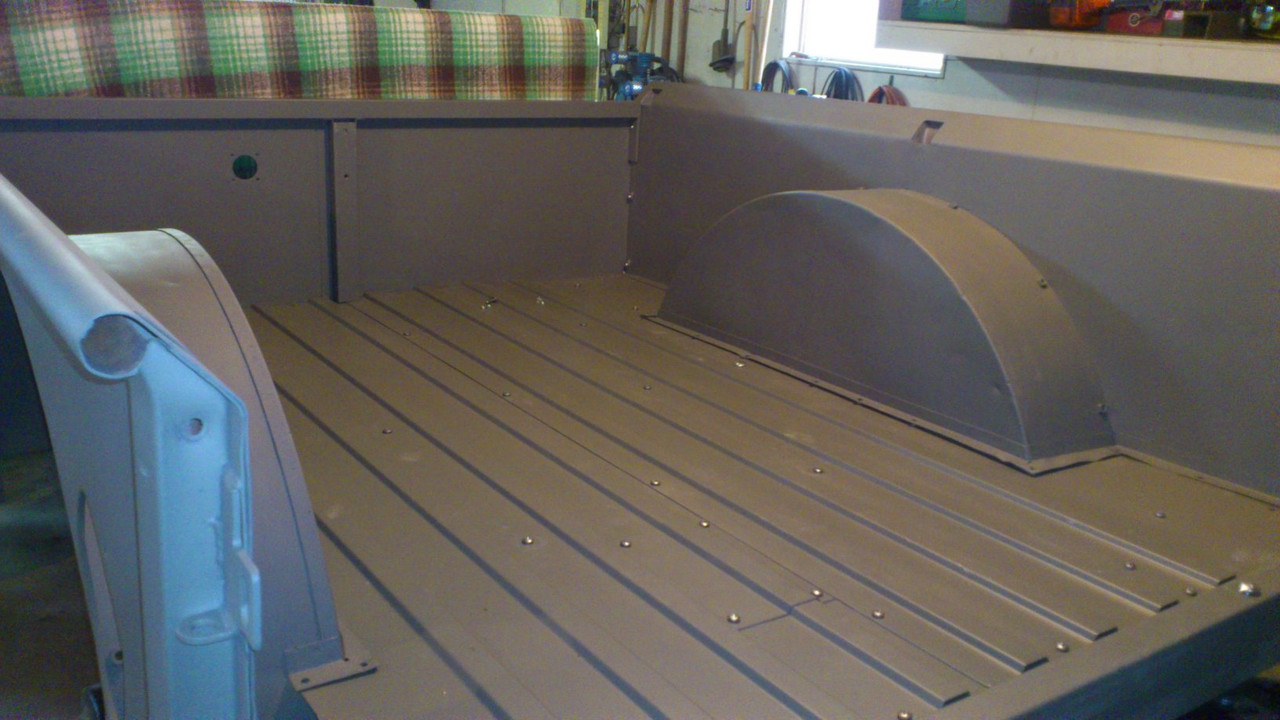
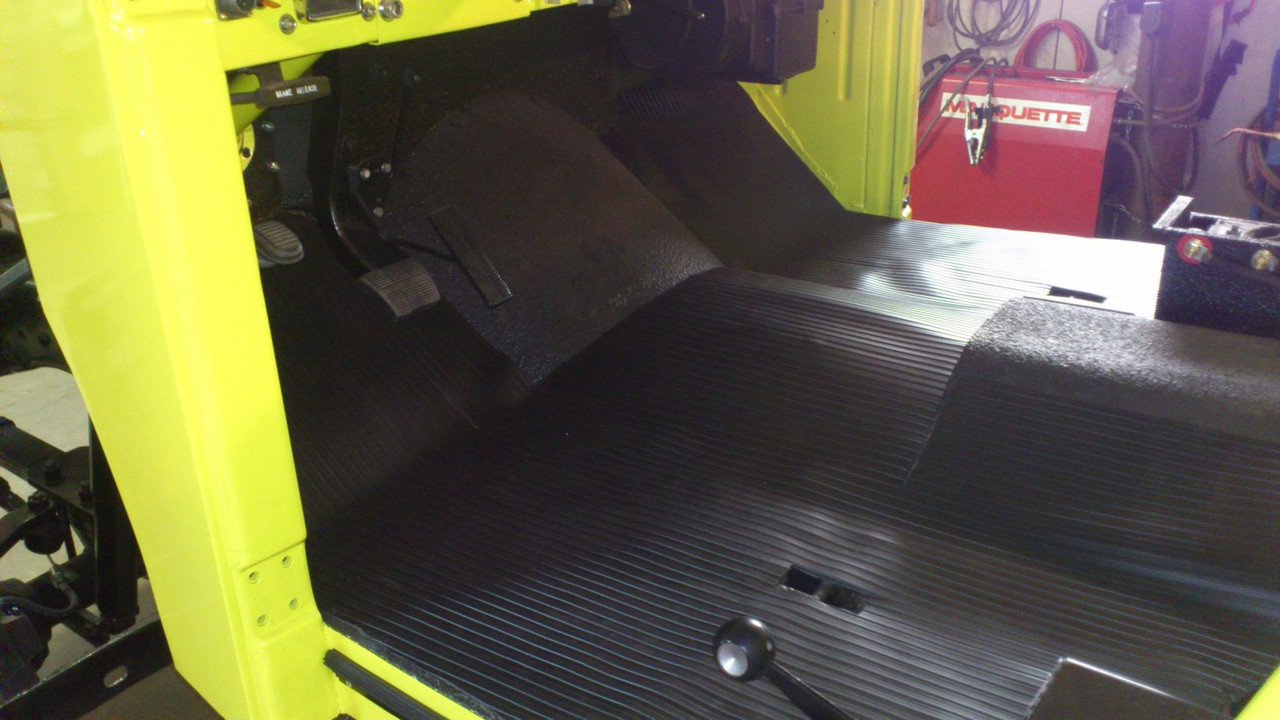
Then I finished the floor. (beats the carpet I talked about earlier in this post) What do you think?
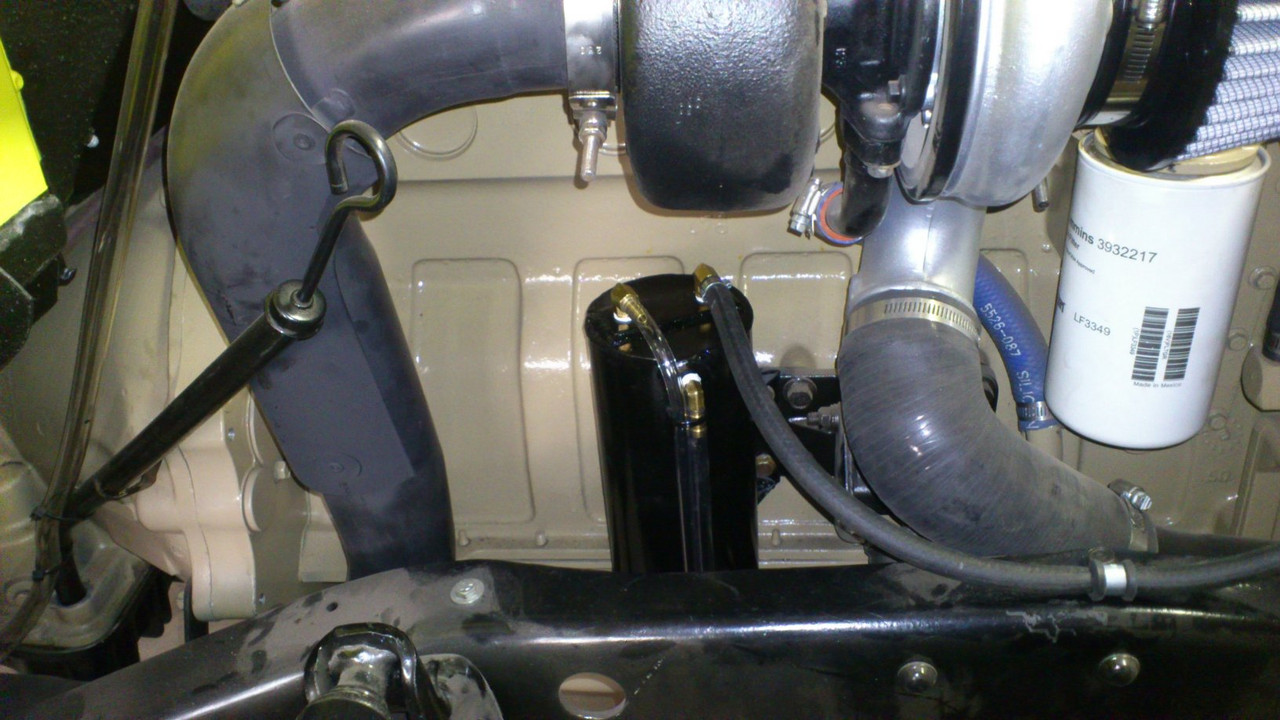
The las thing i did was the rad surge tank. I had no idea (at first) where to put it. So I grabbed a piece of 4" exhaust pipe and started putting it here and there. This is what I came up with. The clear tube is a guage for me to see if there is anything in there. Also there is a drain on the bottom in case there is too much in there. It has no filler cap because for one you can't get down there to fill it anyway. but the rad will push some in there when it warms up and take it back when it cools off. What do you think.
The last thing is I have a request from any one. I need a picture of the door seals to see where they go and at what clocking. Also the windshield to cowl seal. The front fender seals came with a split rivit thingy. Do you just pust that through and spred the prongs to hold it in? Any help would be appreciated.
Re: Building a retro M37
Posted: Wed May 02, 2012 12:13 pm
by m-37Bruce
I think i have a pic of the door seals & I can take a pic of the windscreen bracket/gasket install.


Let me know if you need another or a better shot, I used small s/s phillips screws to mount them, I got all of my rubber goods from John & Midwest Military.
The holes on either end are where the small step gasket goes, it rubs on the door as it closes. Do you have the metal strap/support for the windscreen bottom, it rests in the gasket itself, I used it to make the holes in the gasket. I will need to take a pic of this with the windscreen lowered.
Re: Building a retro M37
Posted: Wed May 02, 2012 5:59 pm
by retiredguy
I don't see a seal on your lower windshield. The seal you show on the bottom of the door opening I laready figured that out. It is the seal that gets glued to the door that I am not sure which way it goes. And I need a picture if the windshield to cowl seal. I think it goes large part out. Also the wheel opening seals have those goofy split rivet things.
Re: Building a retro M37
Posted: Thu May 03, 2012 1:13 pm
by m-37Bruce
I'll take the pic's needed right now, the windscreen has the taper facing forward & the fender welting also has the bulk outside, it attaches to the engine bay filler panel.
Be back in a minute.
Re: Building a retro M37
Posted: Thu May 03, 2012 2:17 pm
by m-37Bruce