
 Home
Home 
Im installing my vent door and its not sitting flush on one side. Is there a trick to get it to close and seal evenly?
Thanks
Cowl ventilator adjustment
Moderators: Cal_Gary, T. Highway, Monkey Man, robi
Cowl ventilator adjustment
Gerry
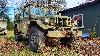
53 M37
53 M37

Re: Cowl ventilator adjustment
im surprised this subject never came up on the thread toughest task http://www.g741.org/PHPBB/viewtopic.php ... 5&start=15
the only advice i can give is check that the cowl is strait, the hinges are well lubed and keep trying till she looks right.
the only advice i can give is check that the cowl is strait, the hinges are well lubed and keep trying till she looks right.
.............................. use it ...............

Re: Cowl ventilator adjustment
Greetings Folks,
Gerry I just went through this aggrivation in Sept through Oct. while doing an engine replacement.I started out with alot of room to work.The dash and underdash were stripped for phosphating,priming,and painting.The motor and trans were out with the trans cover removed,and I worked out of that hole for awhile.I installed and adjusted the vent so that it was level and I could get full throw on the actuation.When I had removed it virtually every pivot point was siezed.Now everything was working smoothly.I had to open the 4 holes on the vent "body"where the arms bolt to it for more adjustment.The vent body sits to the rear now so the front doesn't contact early and bind before the vent is fully open.
Eventually the motor went back in,was made to run,the front clip was reinstalled,and the dash was put back togeather.I had lost my generous room,but still had a persistant problem,the vent leaked with every rain.
I've noticed this truck's vent has a curve to it,right to left.I tried to minimize this earlier as the cowl is fairly flat right to left.I couldn't minimize it enough to stop the leaking.
After the other motor and dash items were done,I went back to the vent.My other truck,a '62 B1,has a vent that sits flat and flush in the seal/well area.The running truck's vent doesnot sit flush,in addition to the curve.This truck is a '52,if that has any bearing on the difference.Both sets of parts appear to be original.The only new part was the vent seal I replaced.That may be why the top of the vent doesn't sit flush with the top of the cowl,but the real problem is the curve that rises to the middle,side to side, and leaves an open gap for the water to get in.
I finallt got tired and removed the vent body.I installed FrostKing V25W D-profile seal around the perimeter of the underside of the vent.It's off-white,but that was the only color I could find.Black would be much better,but it's not too noticable.It's a self stick seal that holds well and coforms to the curves.The vent seals well now.
My final hurdle,and the one I was dreading,was re-installing the vent body.As it turned out,it wasn't too bad.Having the GearWrenches definitely was a plus.Having marked and dremmeled out the 4 bolt holes previously made a necessary step go smoothly.
Get some good lighting,a fine point marker or pencil,and see if you need to open those 4 holes,or some of them.It'll take some back and forth.I removed the trans shifter stick,main light switch,and pulled out the instrument panel with speedo cable disconnected,for more room when I went back in. You may want to put on that seal if your vent doesn't sit flush,before everything is bolted up final.One last thing I needed was the cheater specs to see that close in these days,hopefully you don't.
Good luck,be patient,take breaks to let the muscles relax from the contortions,and think of this: I'm so glad I have a vent that works AND doesn't leak.I'm glad I did it,I'm glad it's done.
Chris


Re: Cowl ventilator adjustment
Is your cowl vent drain hose installed?
Re: Cowl ventilator adjustment
I hope to try again on Monday. I have plenty of room because my gauge panel is out. The hose is not attached yet.
Gerry
53 M37
53 M37